
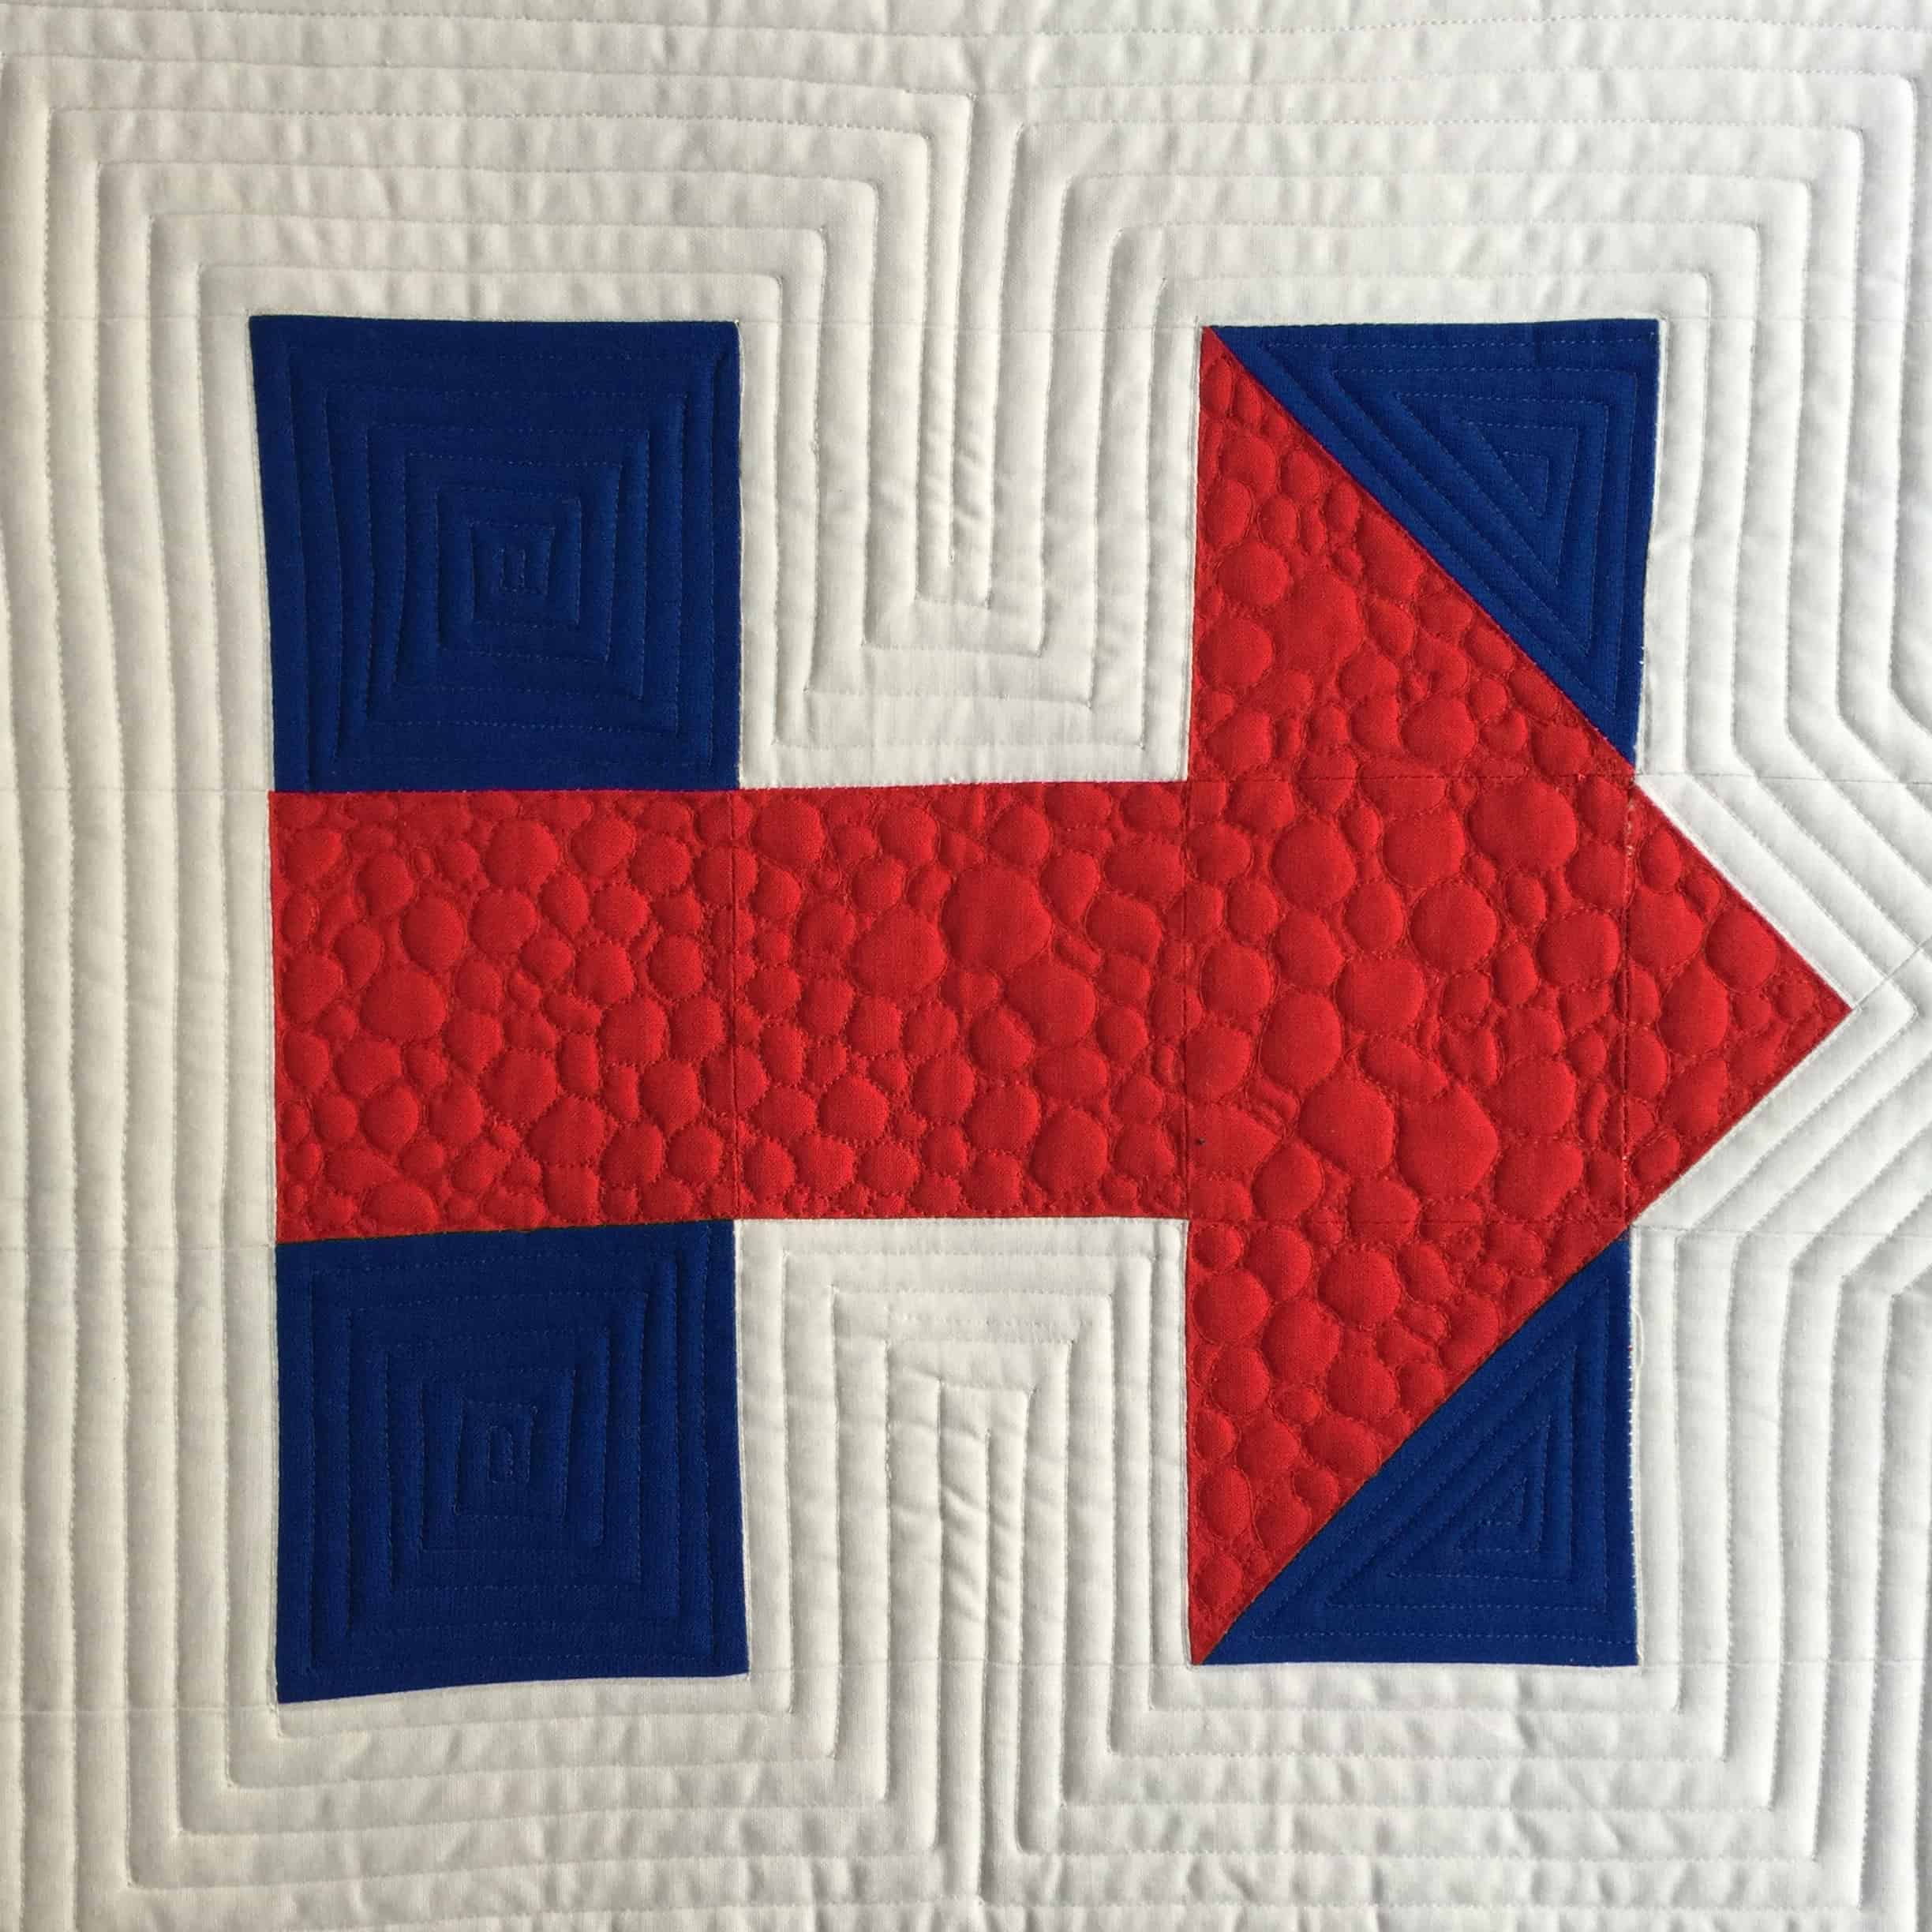
When I first saw Hillary Clinton’s logo, I immediately thought “QUILT BLOCK”!
During the California primaries, I was hankering to show my support and created by own “DIY” Hillary logo block so I gave it a try. I was very happy with the results! I posted about it here in June, and following the historic and inspirational week watching the Democratic National Convention, posted it again on Instagram. I had quite a few requests for a tutorial, so yesterday created a much larger version and will do my best to post as a tutorial!
The first one I made finished at 14″ square. The individual blocks within the H measure 3″ finished (i.e. the dark blue block on the top left = 3″ square.) Being so small, it was fun to do a lot of heavy, dense quilting. And it was a fun and easy project I could do after work in one evening. As you’ll see, it’s all very simple, but the trickiest part is getting the point on the right to line up with the rest of the arrow.
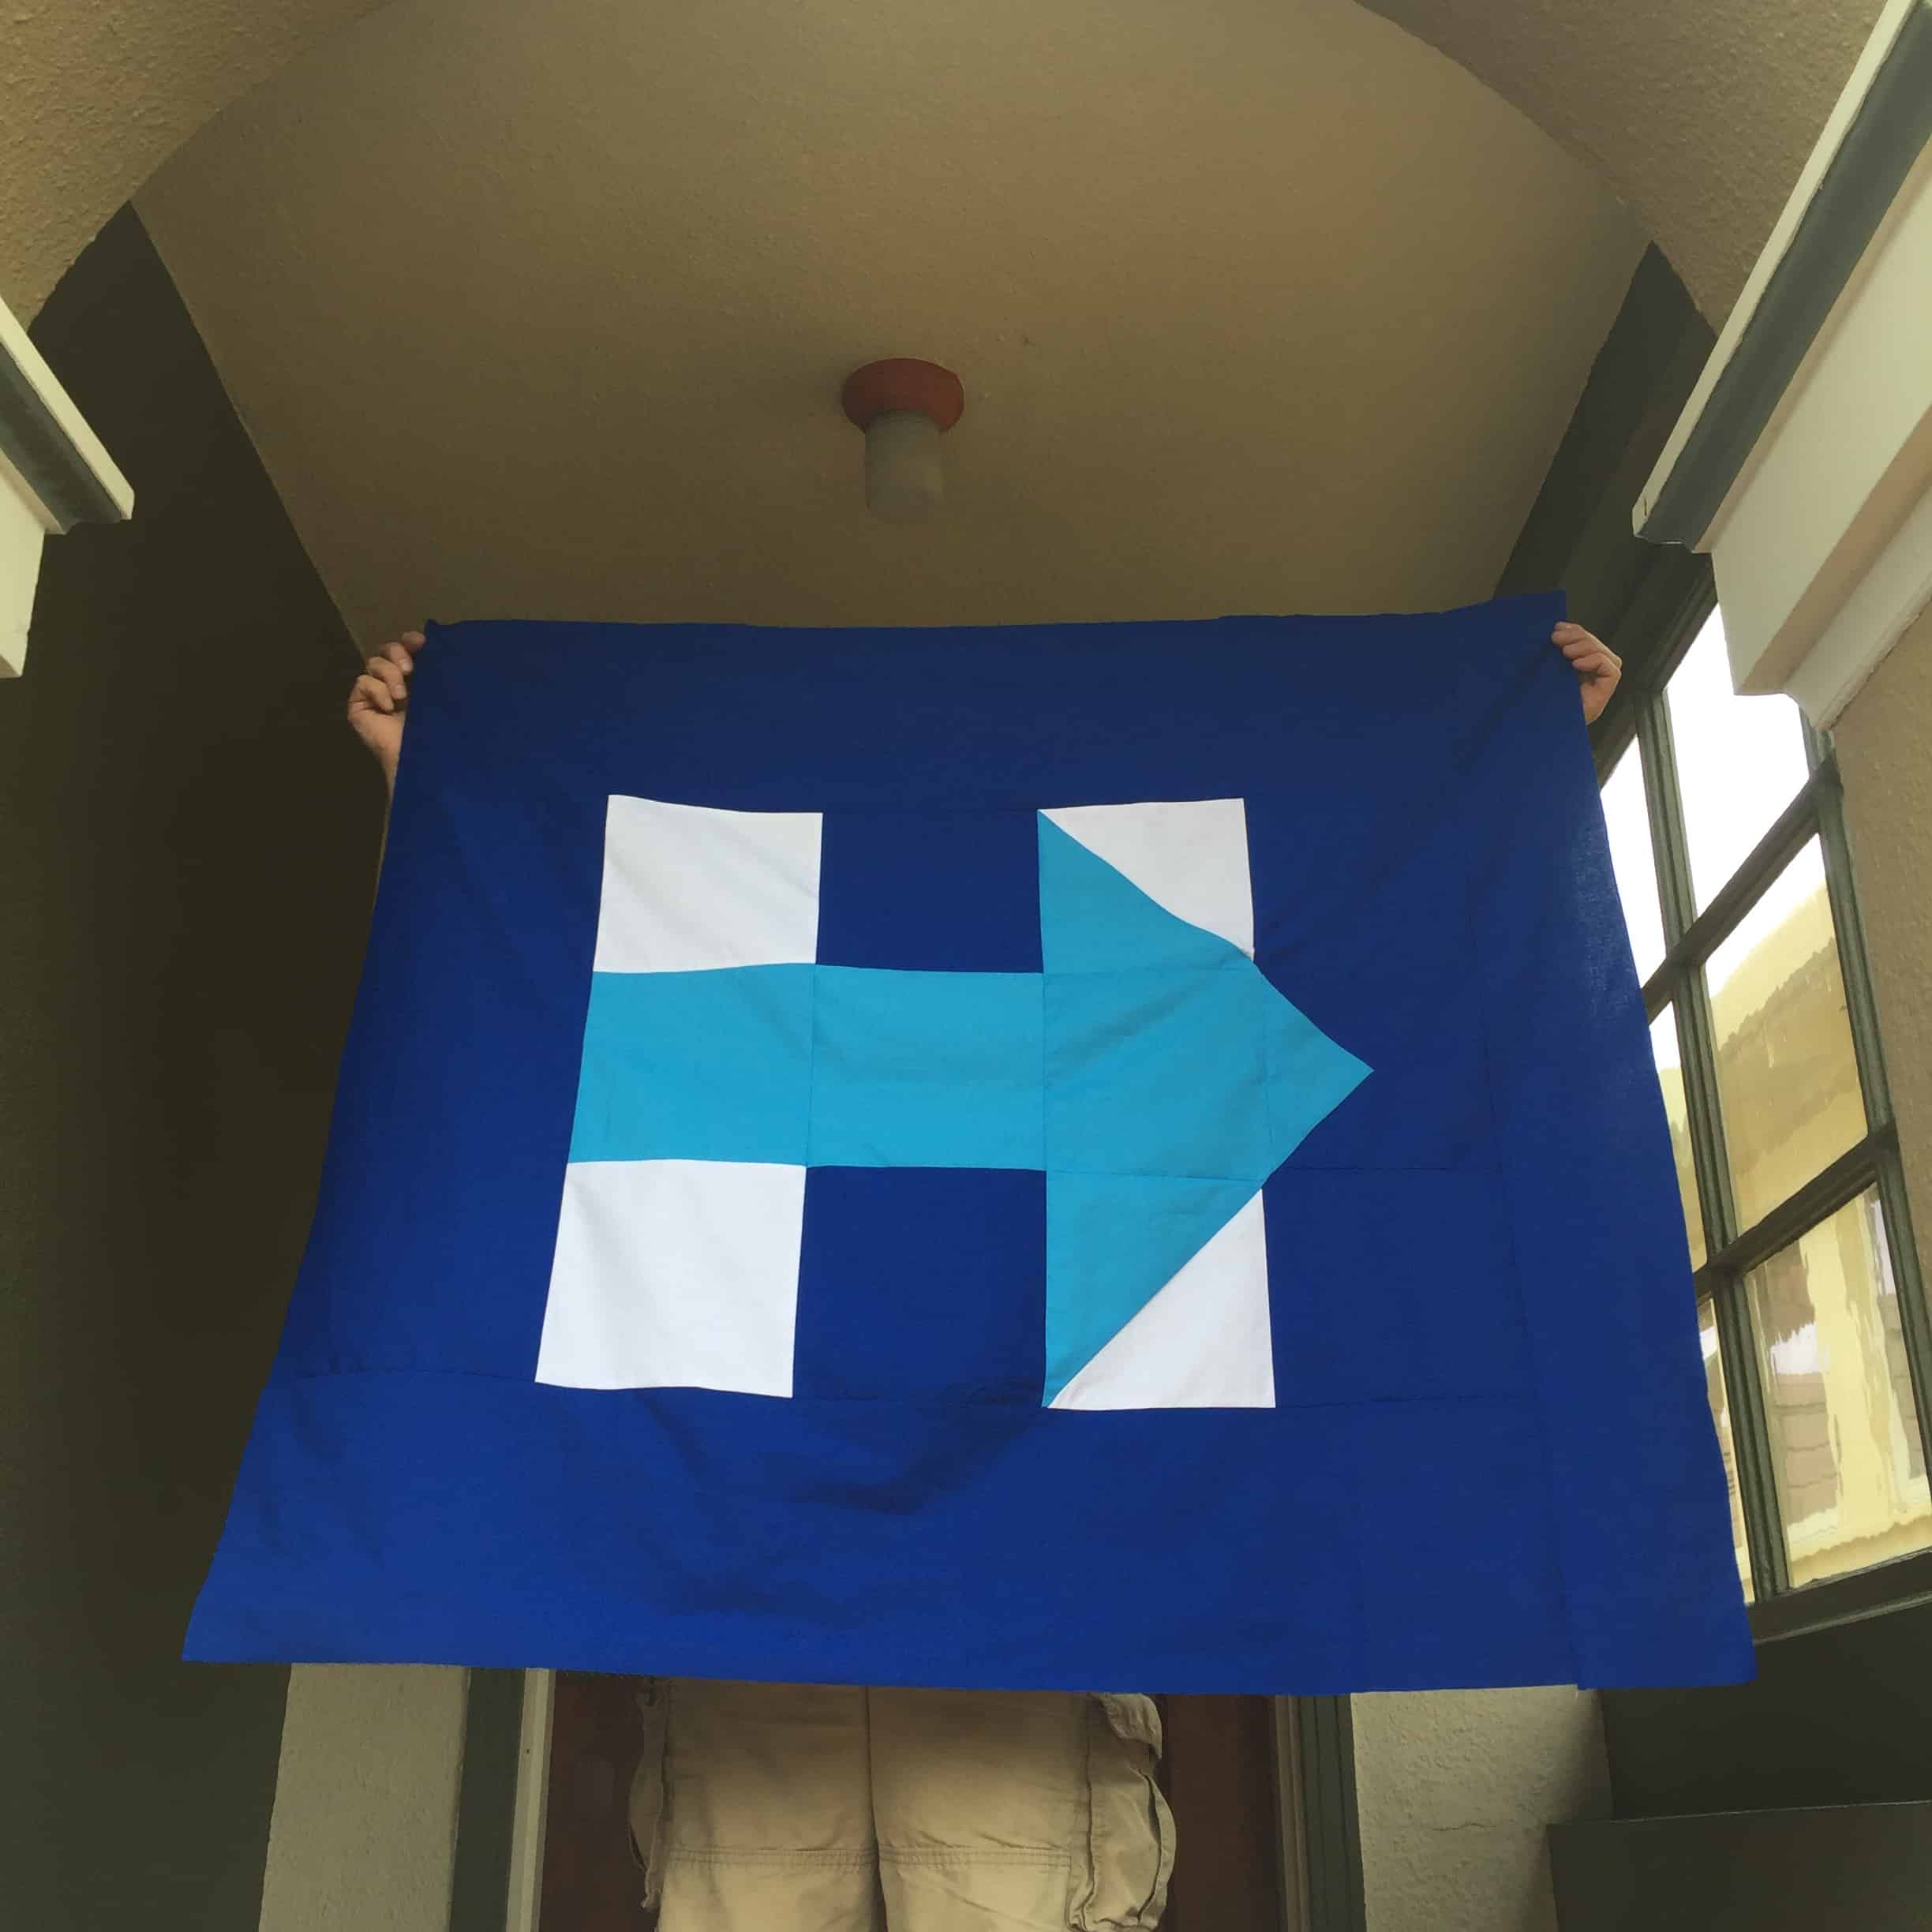
I decided to make the second one bigger and use the blue logo. This one measures 26″ from the white bar on the left to the light blue point on the right. What is shown finishes at 42″.
CUTTING INSTRUCTIONS
Cut the following 8 inch squares:
- 4 dark blue
- 3 light blue
- 2 white
Cut the following 8.5 inch squares (will be used to make the half-square triangles on the right bar of the H):
- 1 light blue
- 1 white
Cut the following 10 inch squares (will be used to make the arrow point on the right):
- 1 dark blue
- 1 light blue
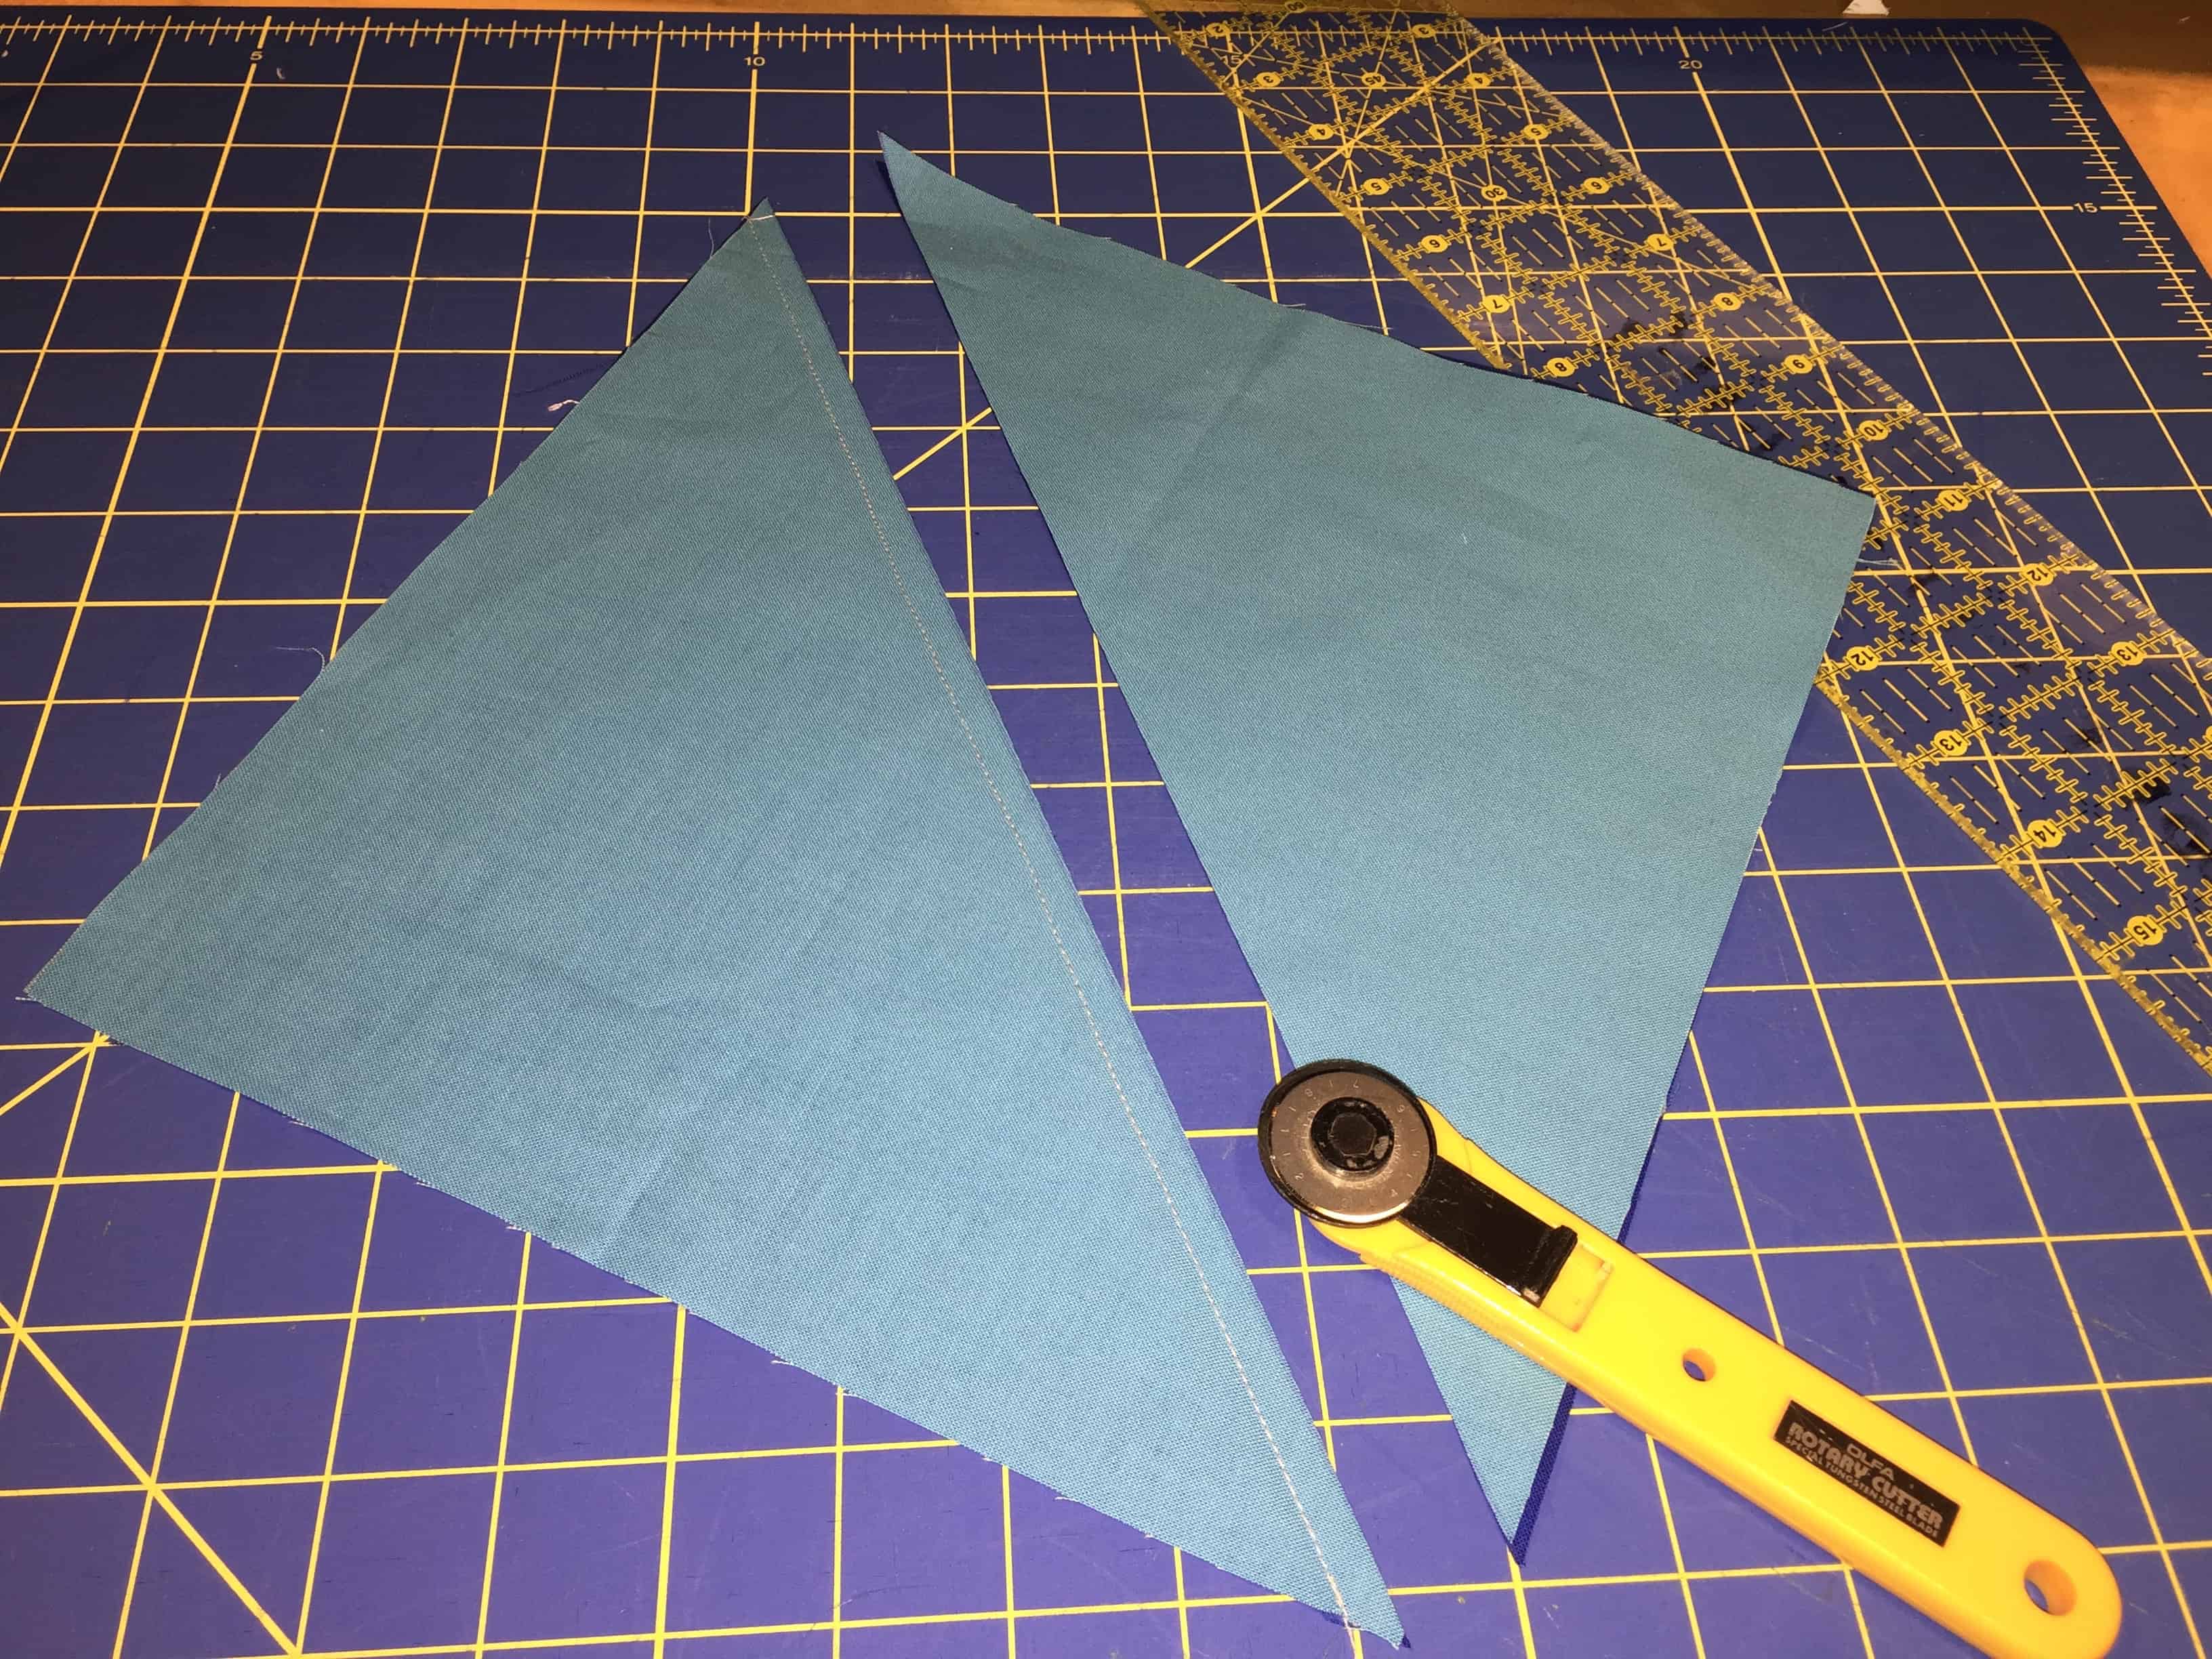
CREATING THE LIGHT BLUE AND WHITE HALF SQUARE TRIANGLES
Mark a line from one corner to the other. I use a disappearing marker for mine.
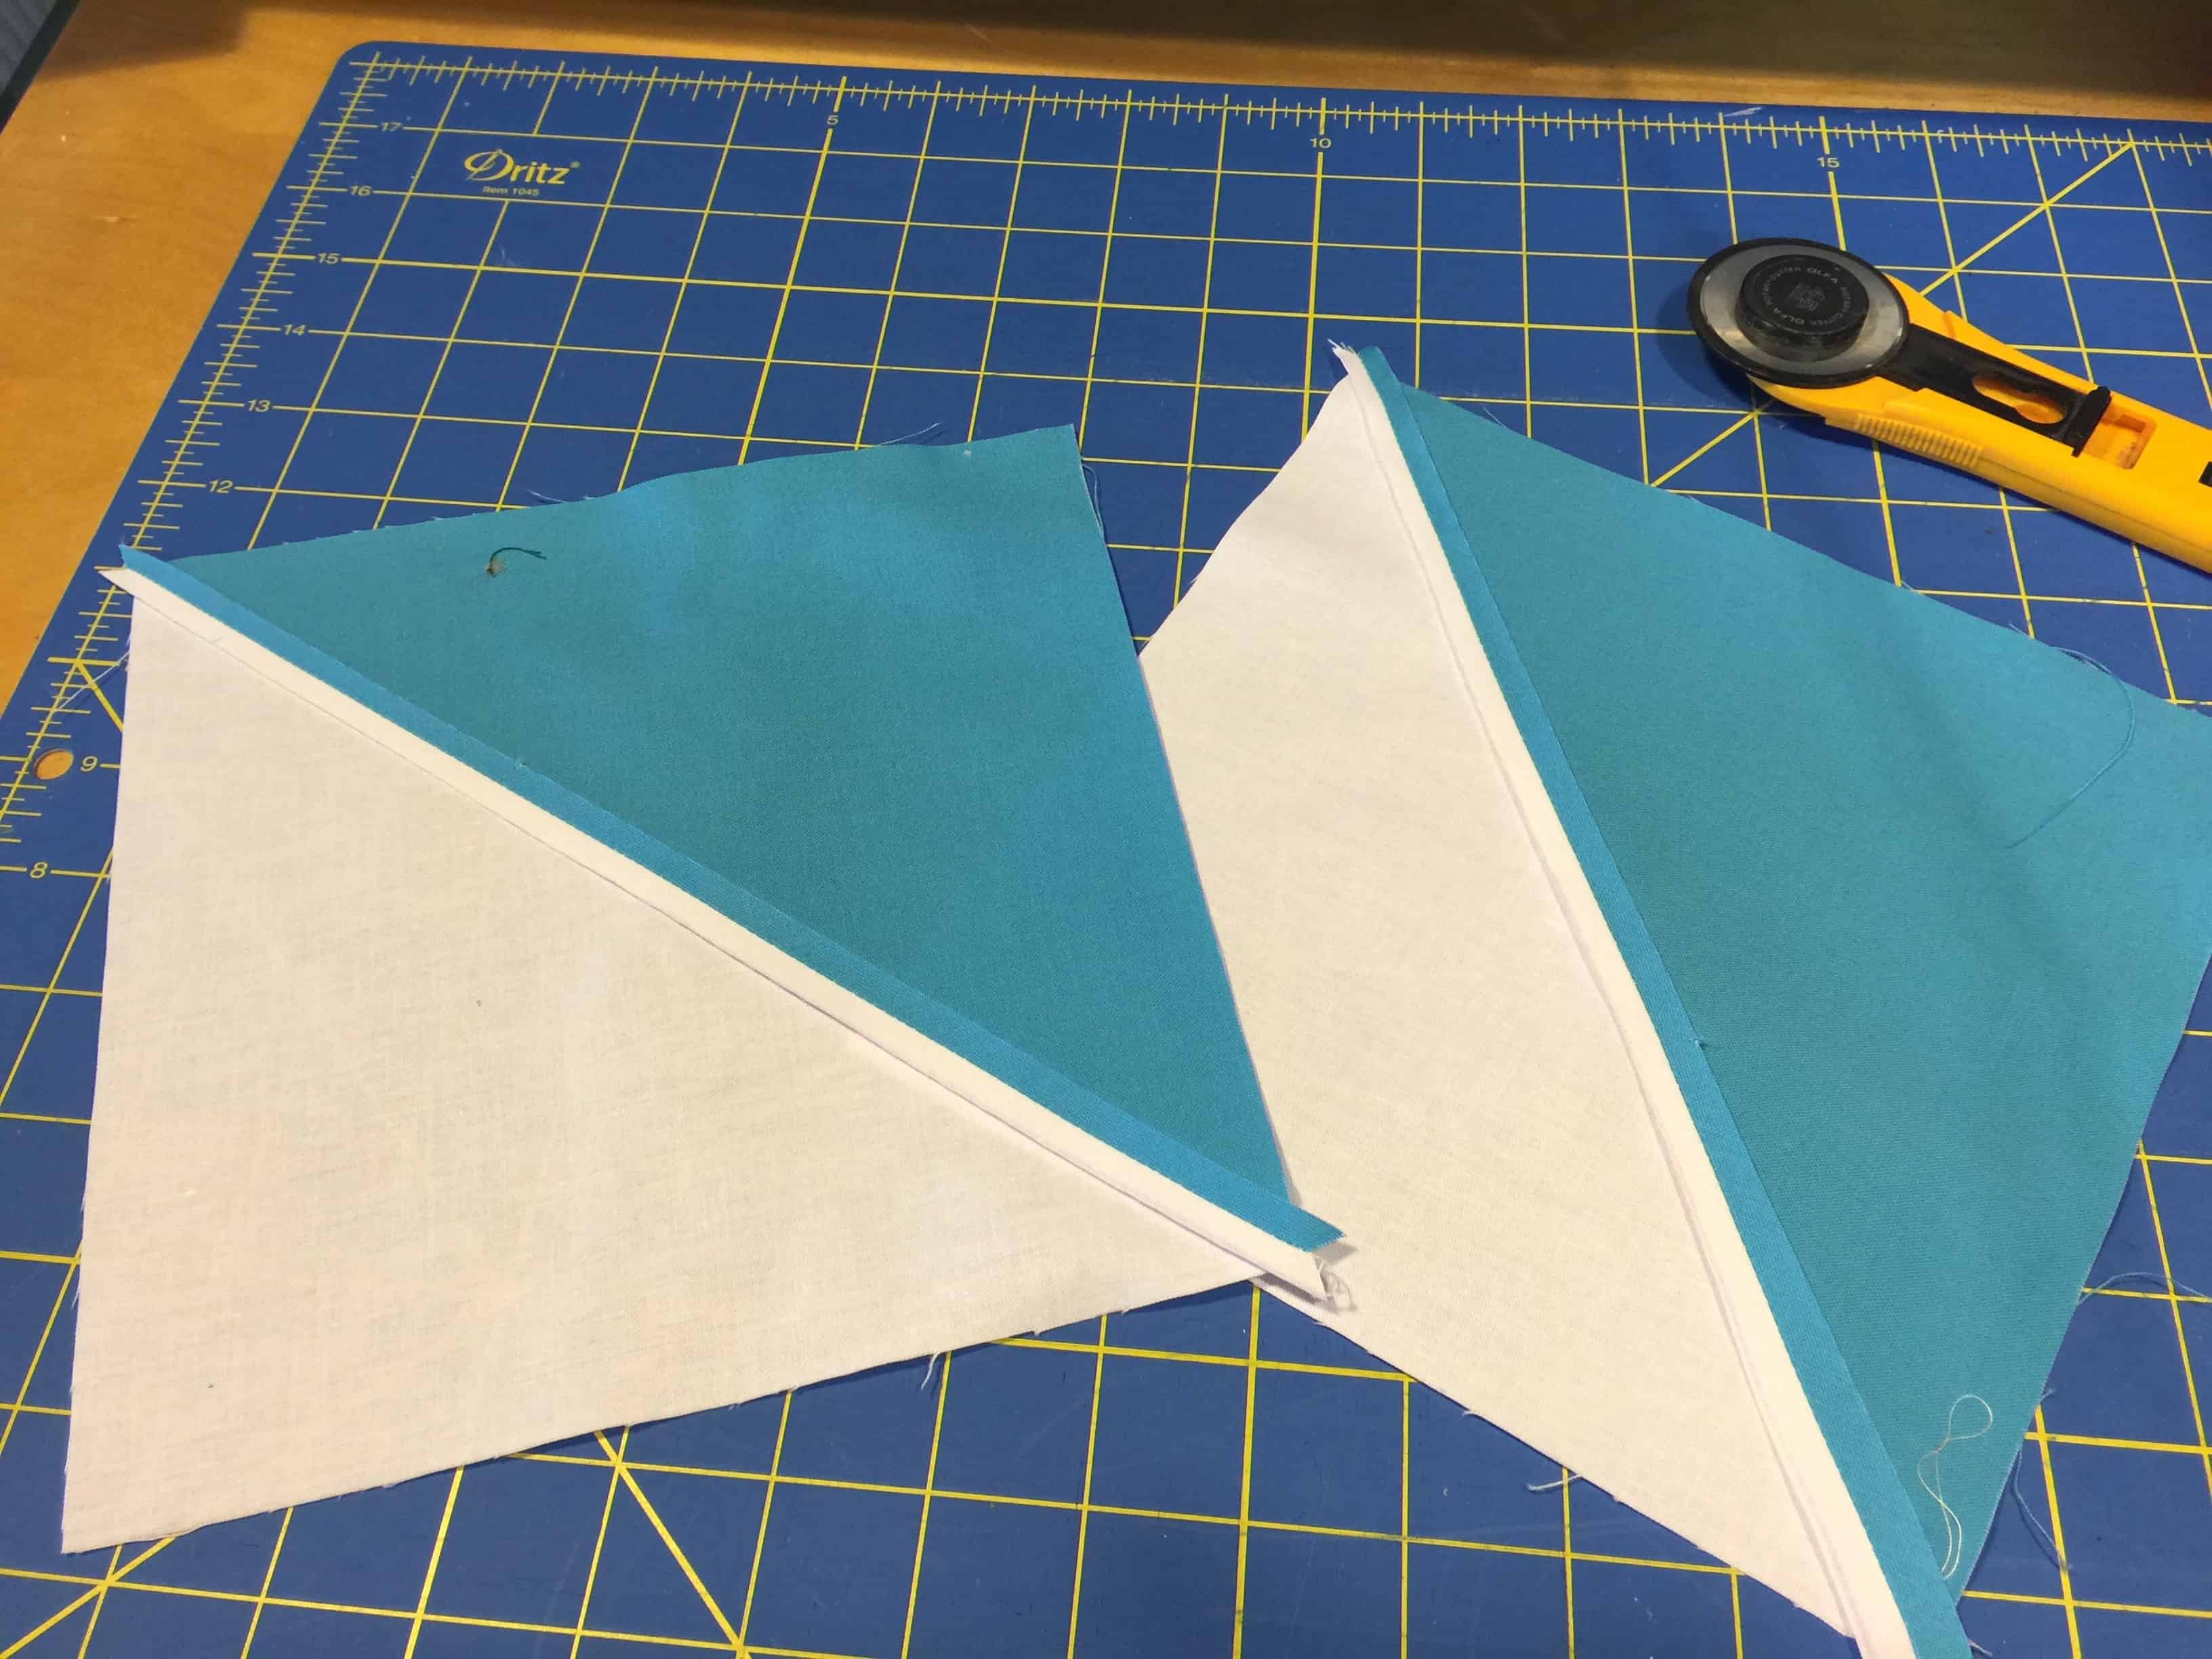
Create a half square triangle (HST) from two 8.5″ squares
On each side of the marked line, sew 1/4″ from the line.
After sewing 1/4″ from each side of the line, cut along the center marked line, separating the two pieces of sewn fabric. Open up and – voila – you have two HST! Press seams open. Trim block to 8″ making sure the seams go from corner to corner.
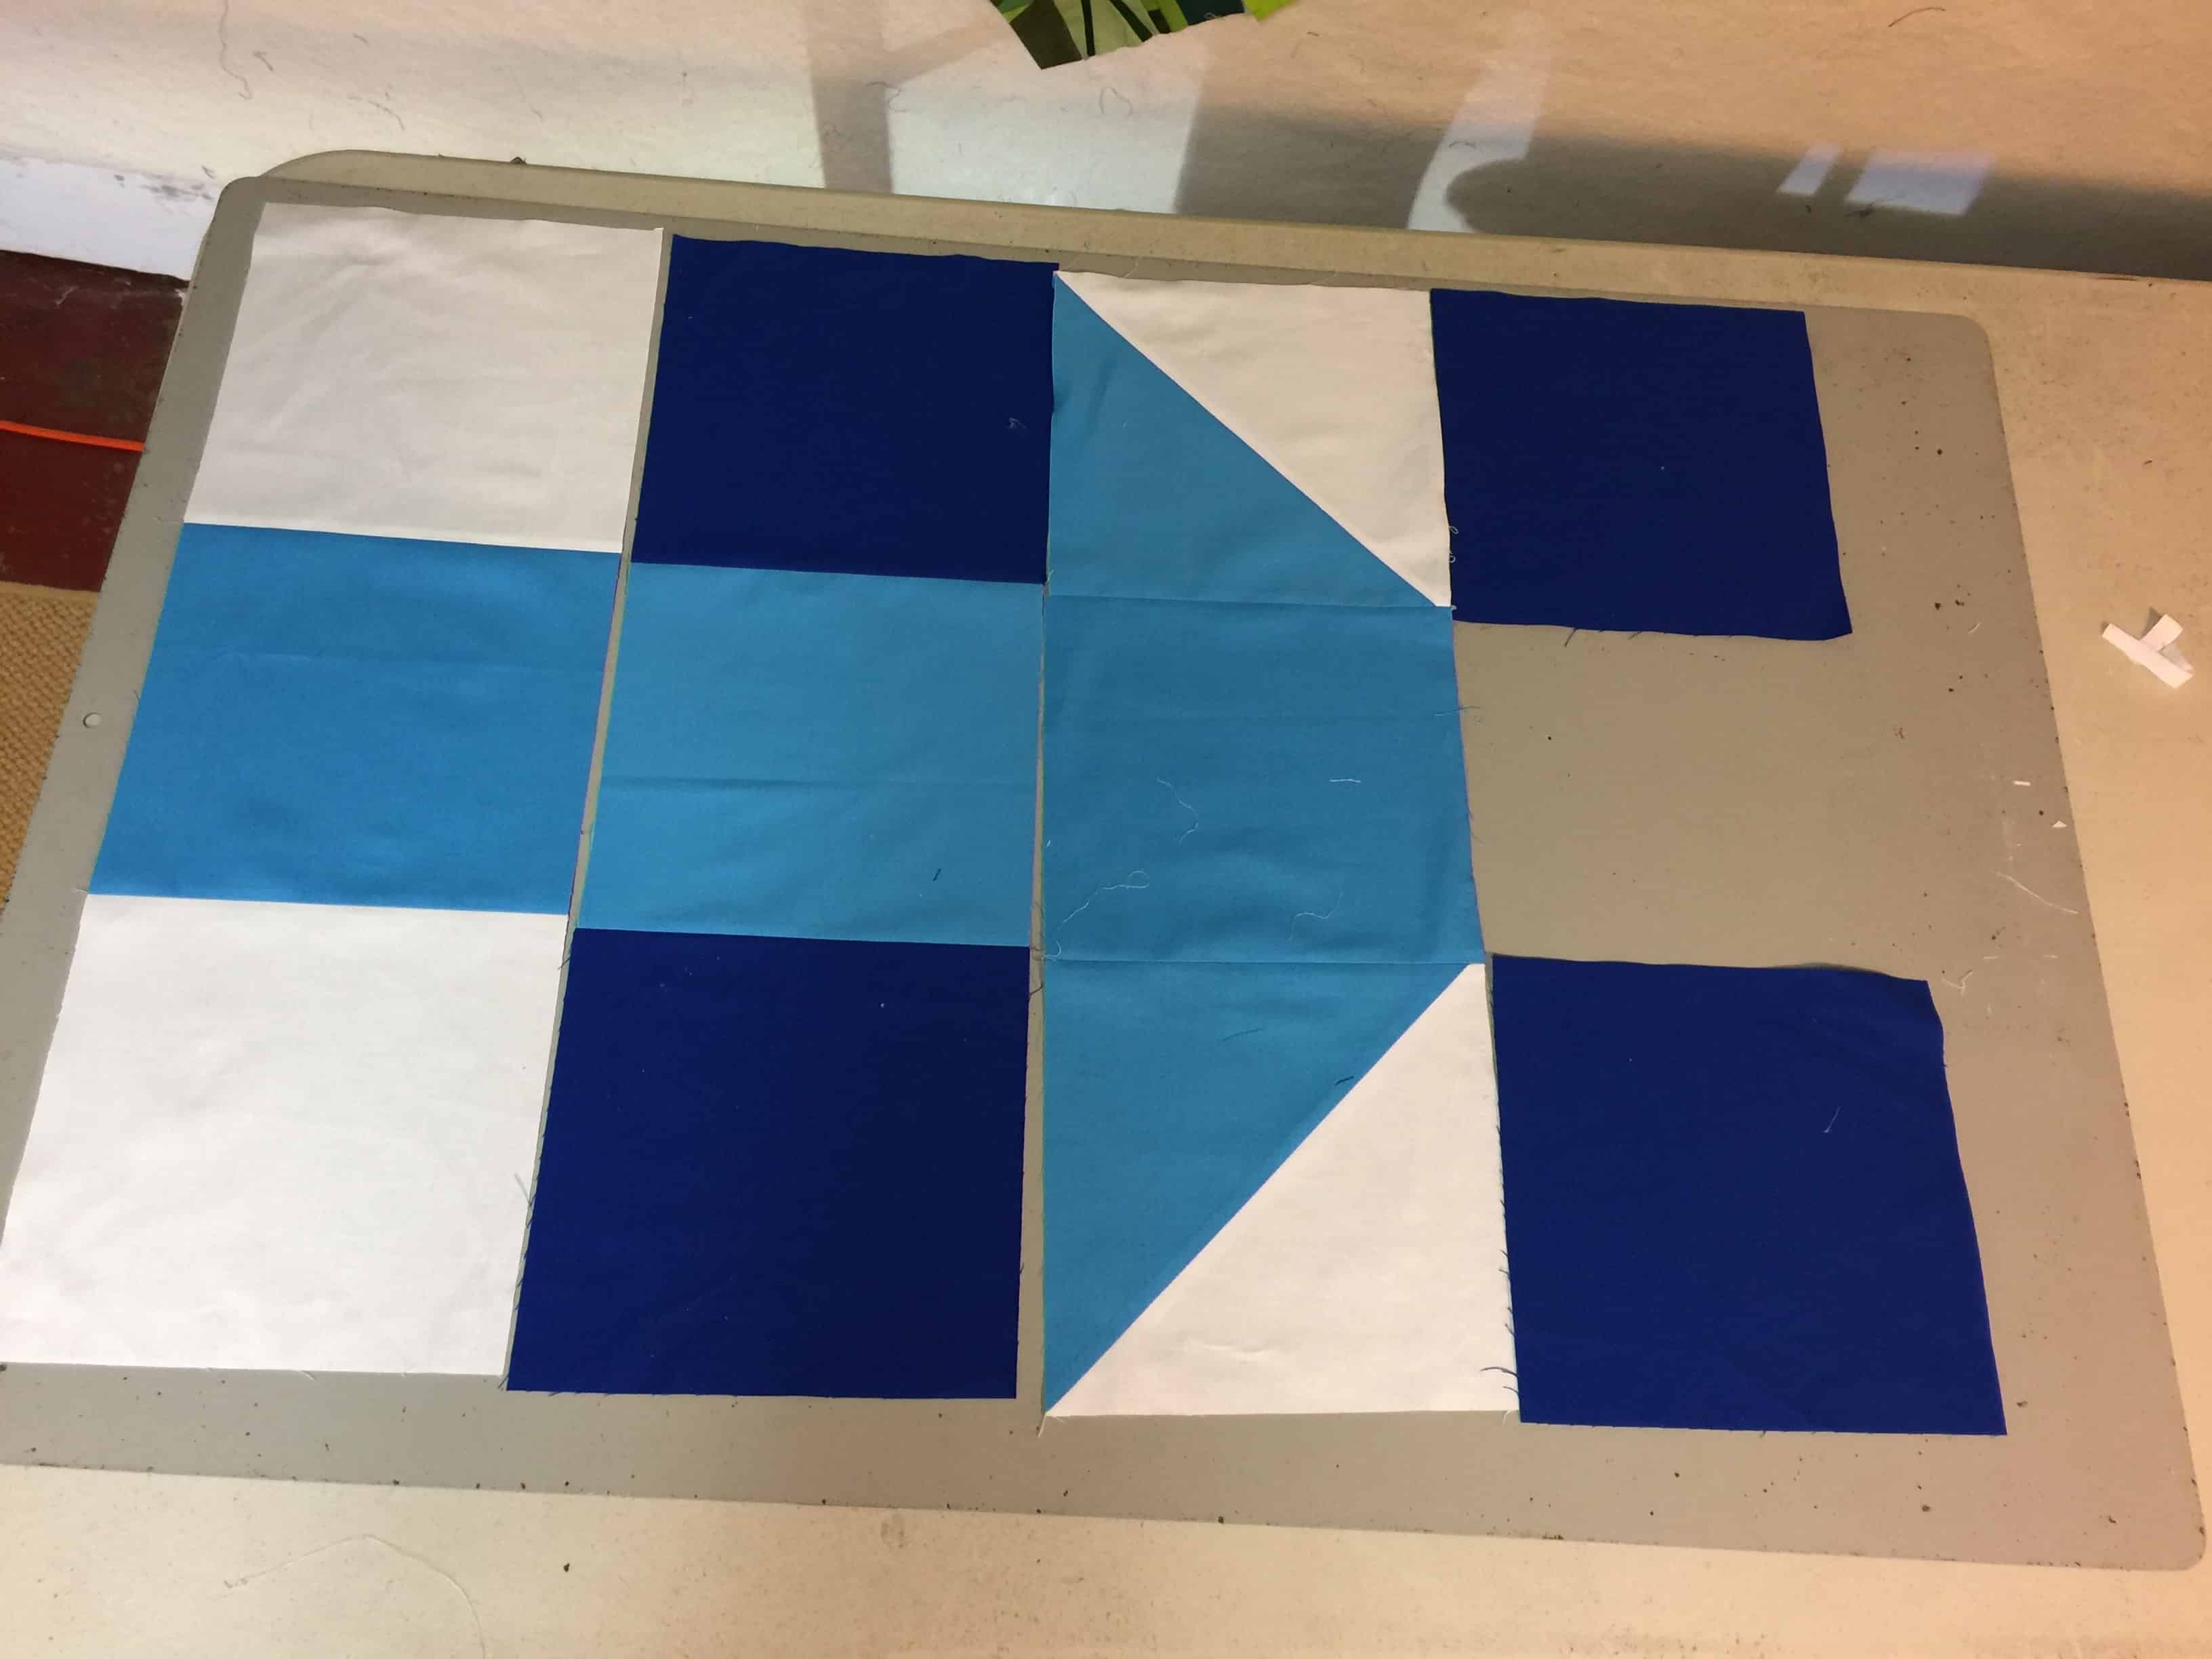
LAY OUT YOUR 8″ BLOCKS SO FAR

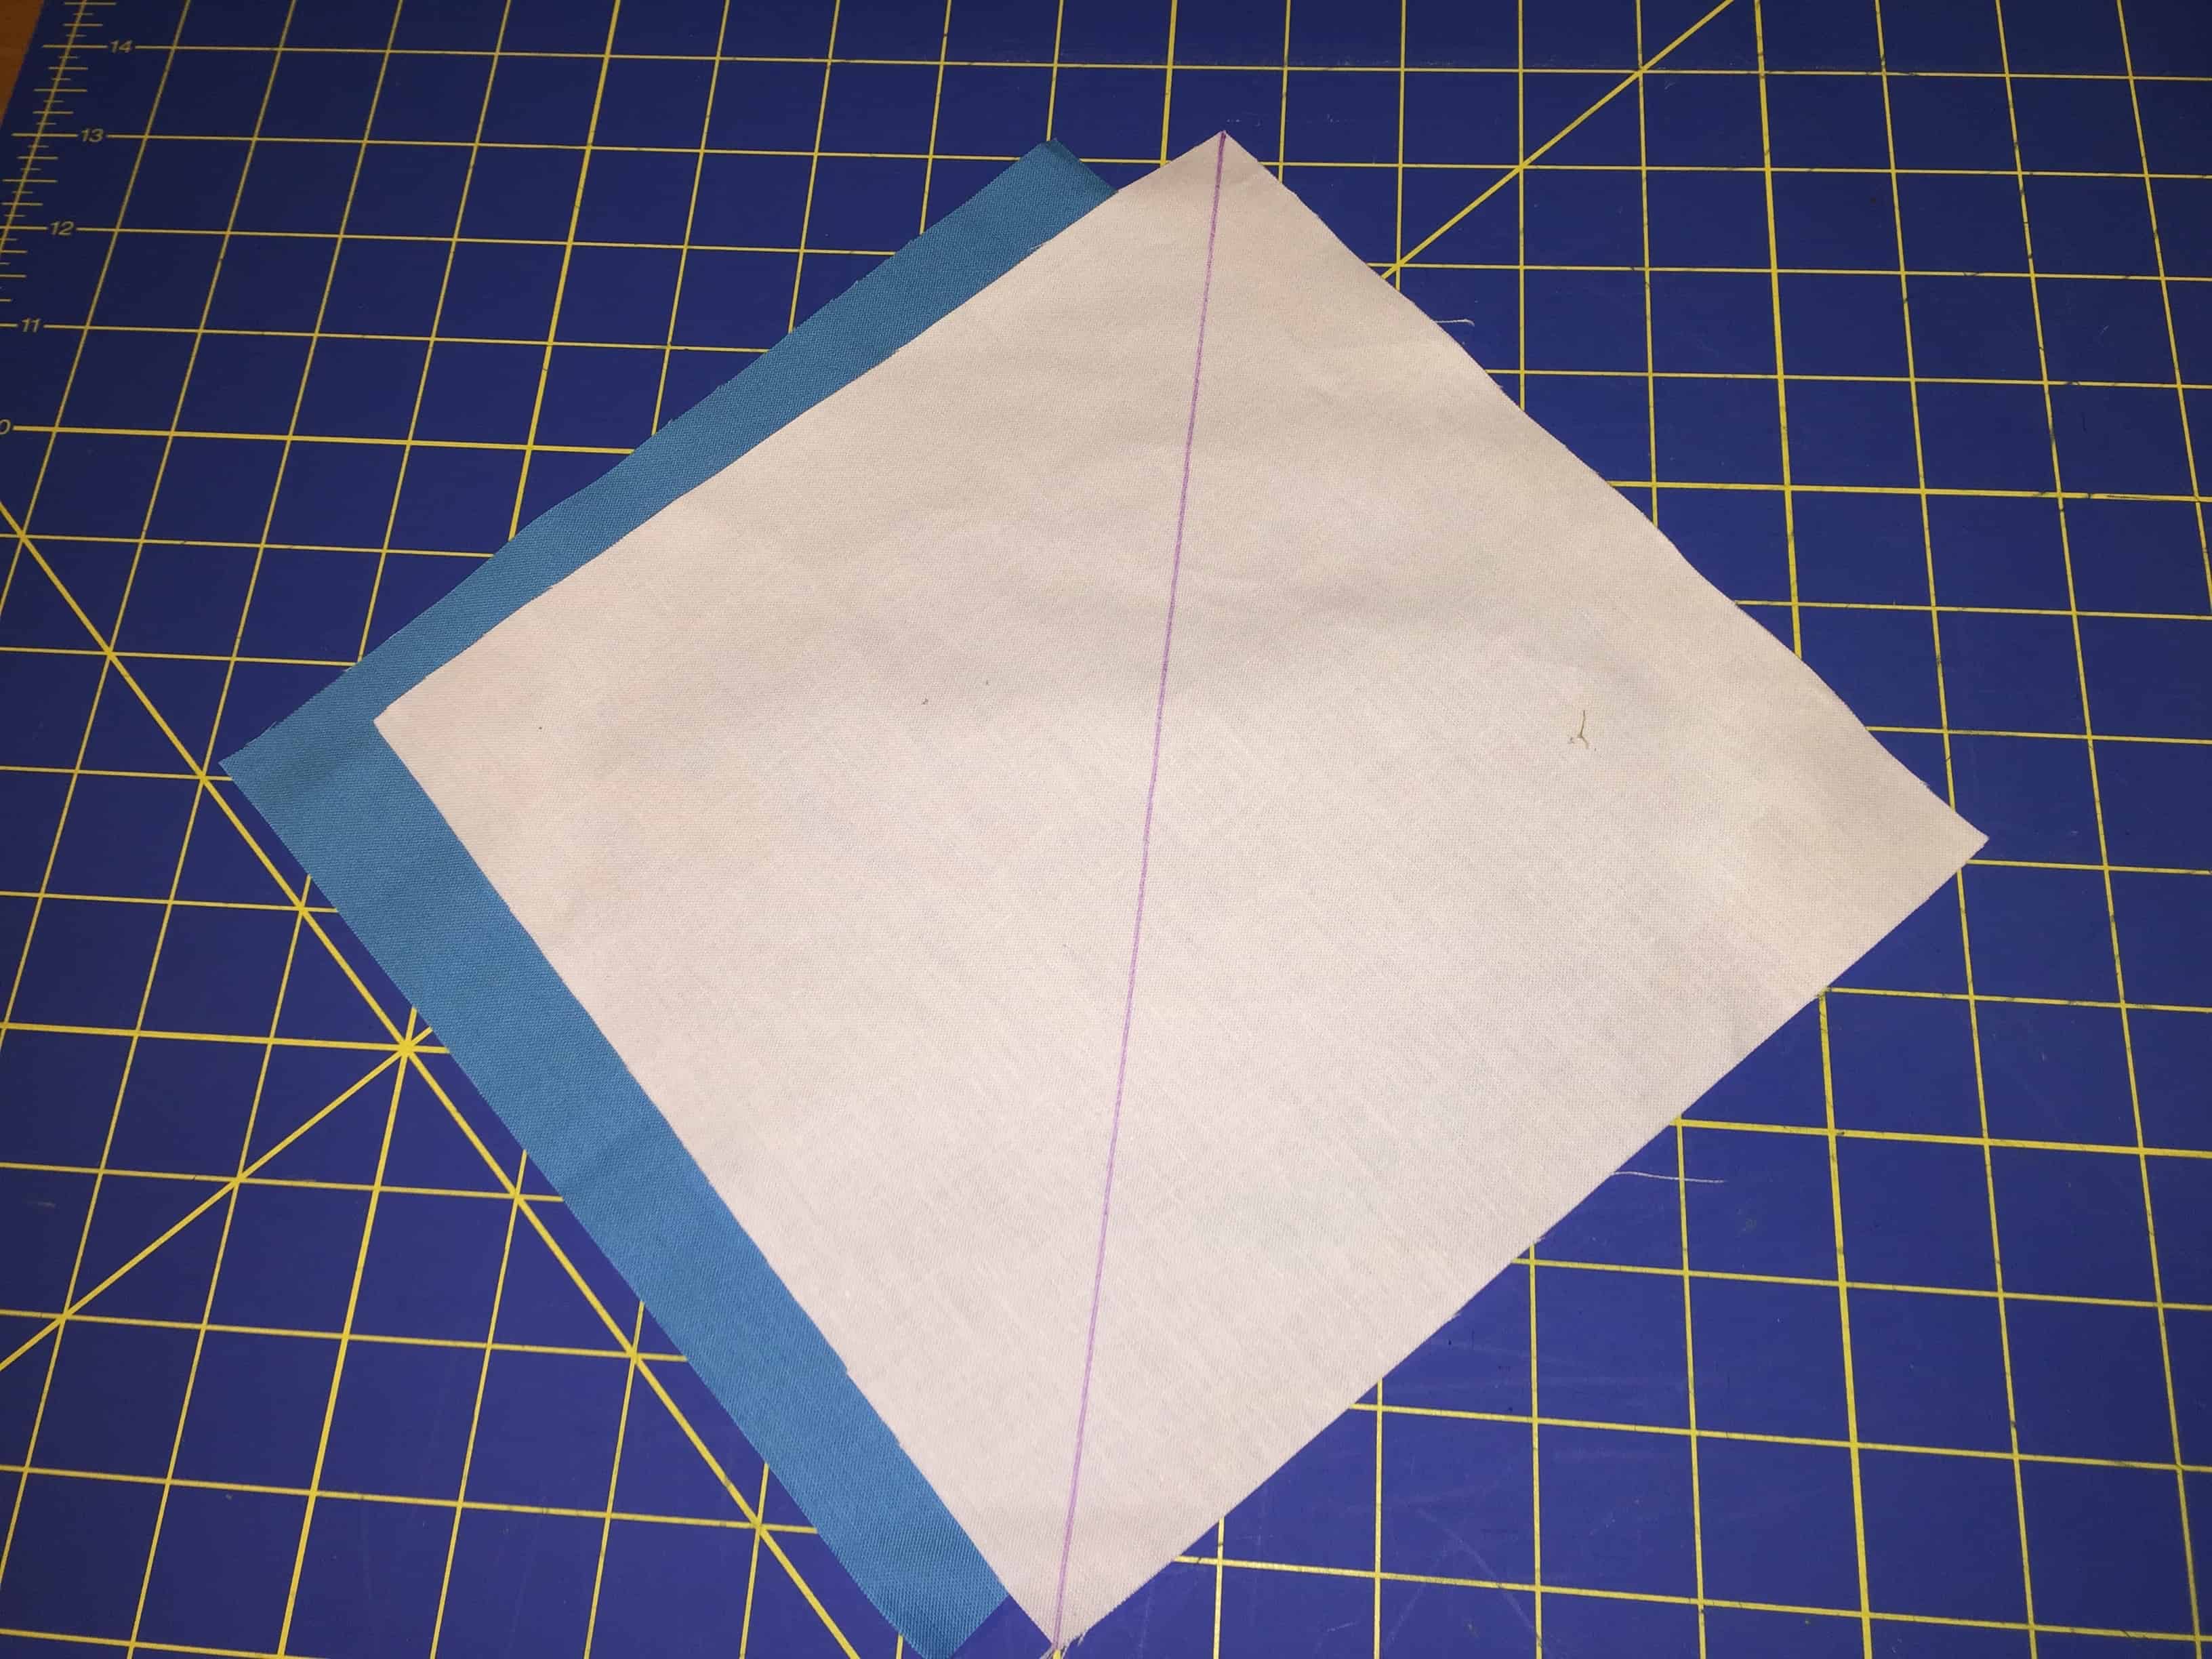
MAKING THE ARROW TIP
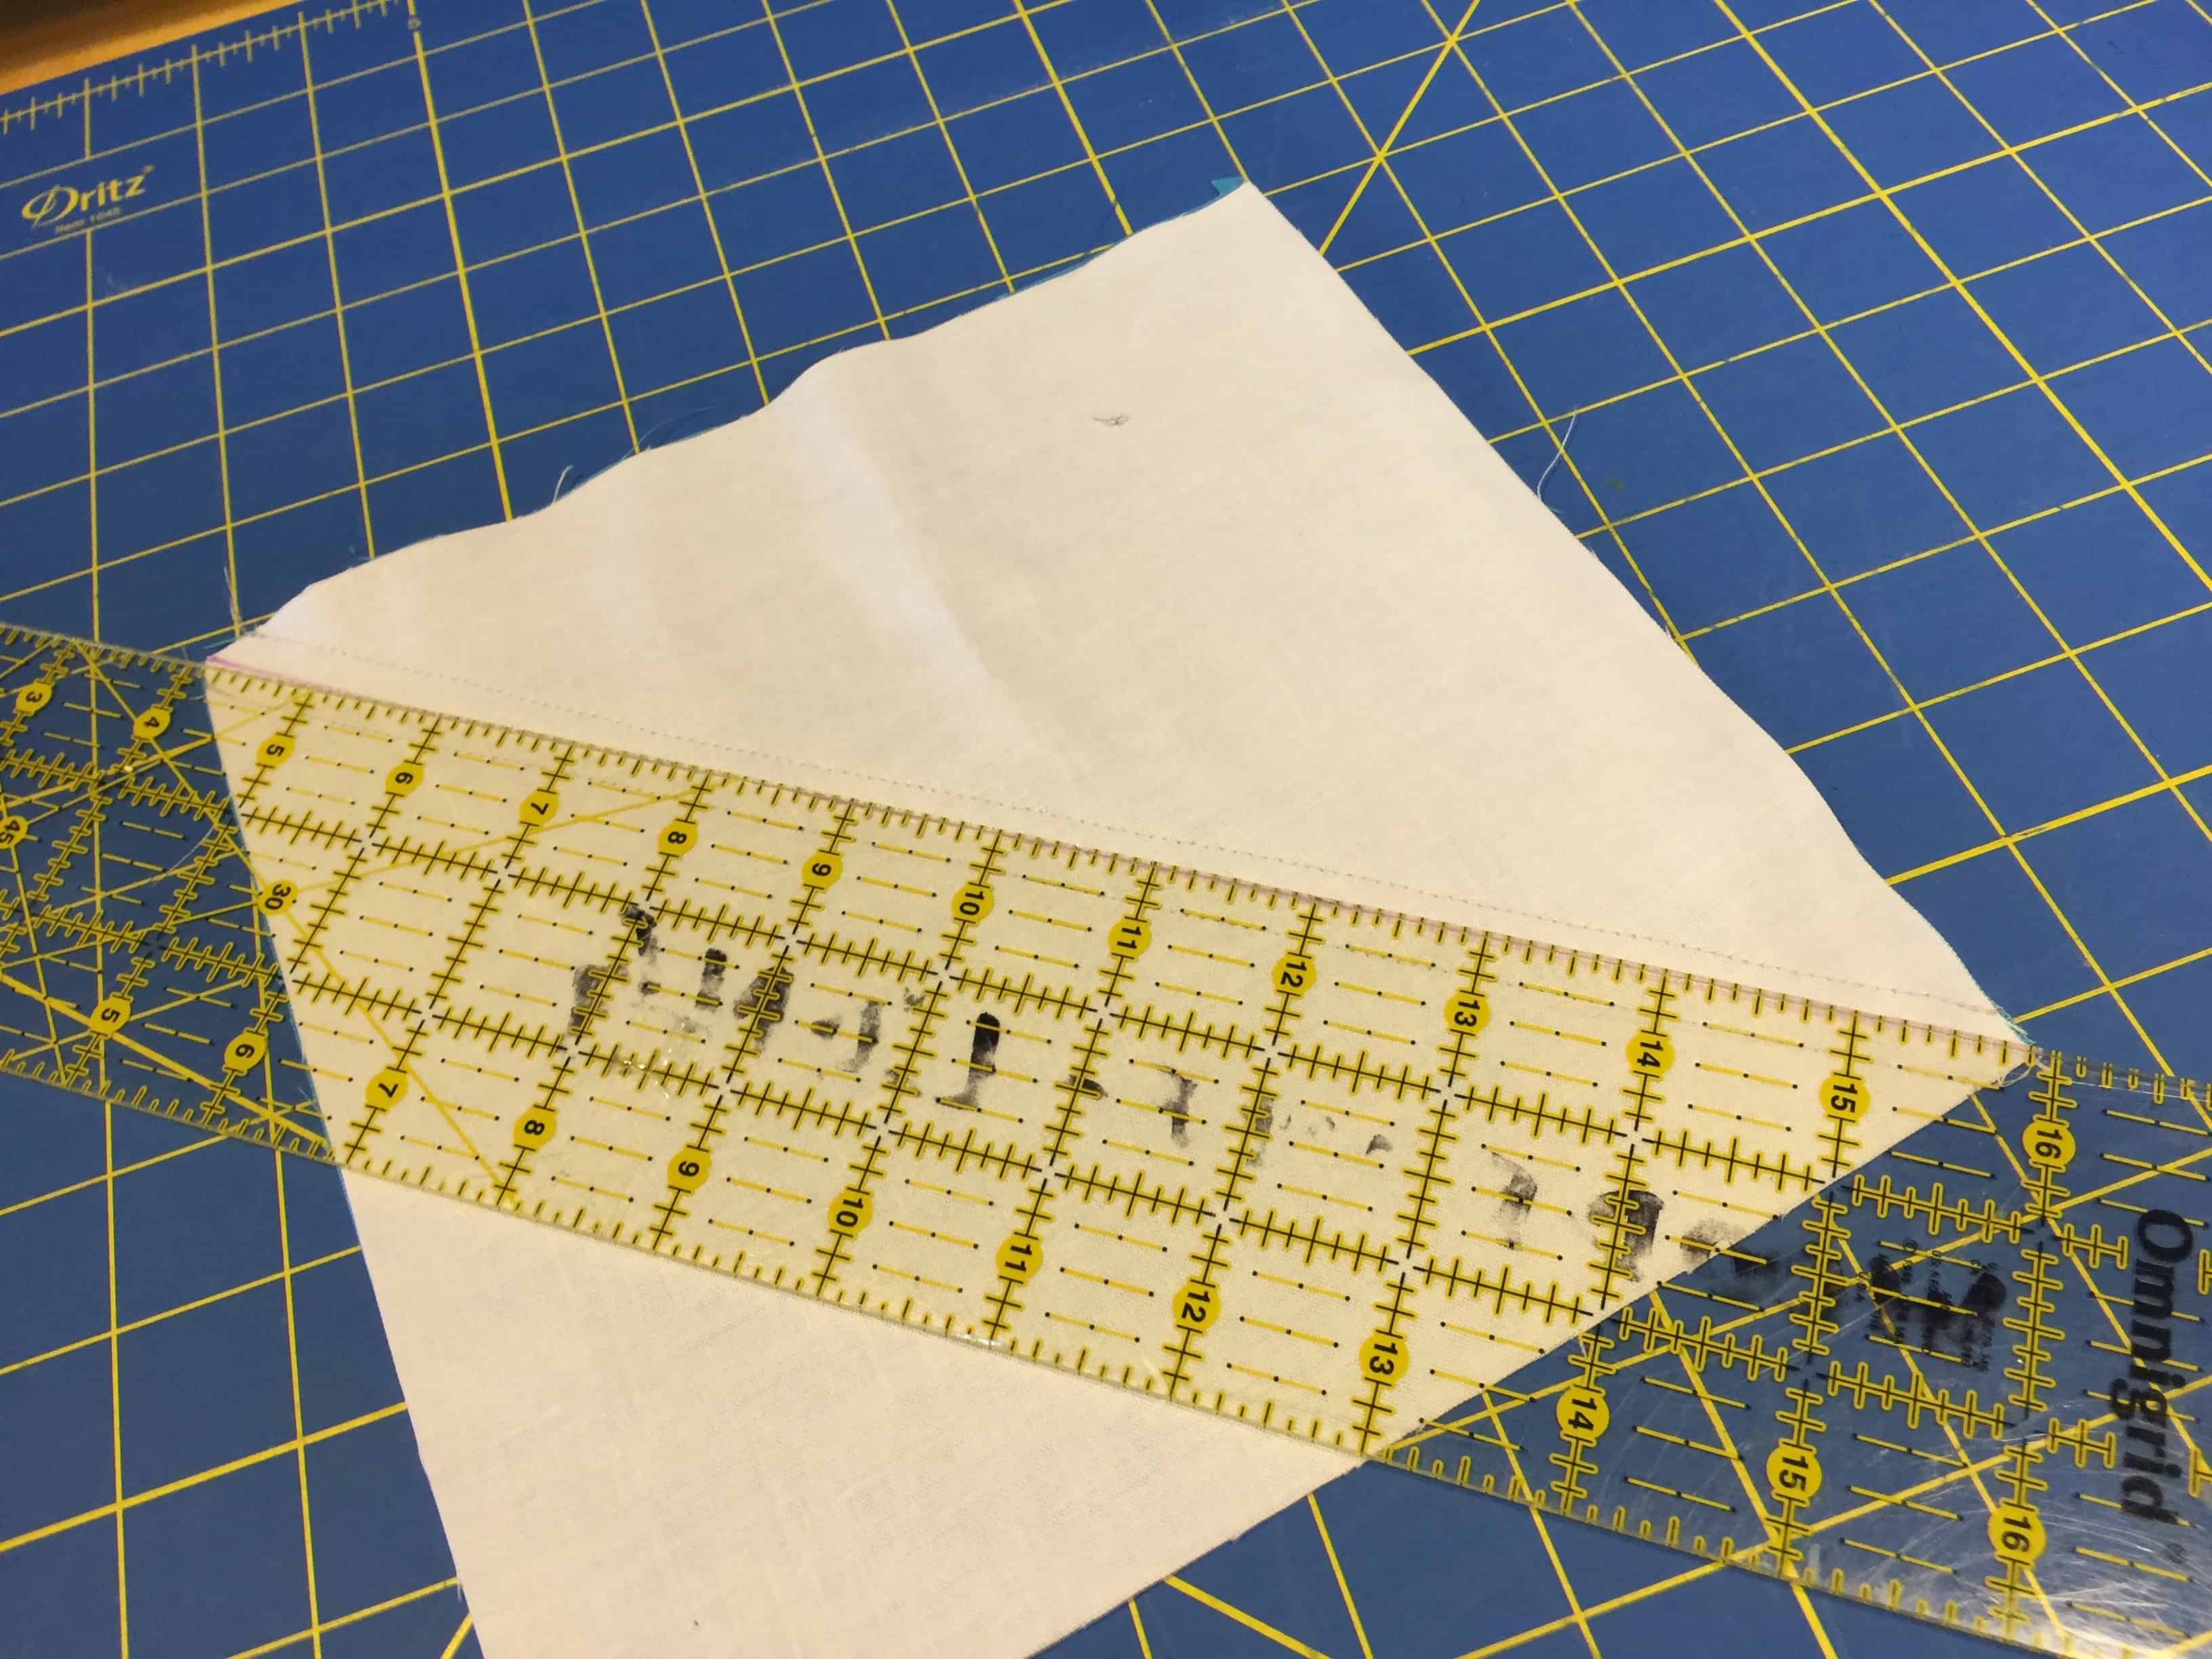
Lay out the dark blue 8″ blocks along with the others. You’ll next make the arrow tip from the 10″ dark blue and light blue squares.
Next you’ll create a Quarter Square Triangle piece (QST).
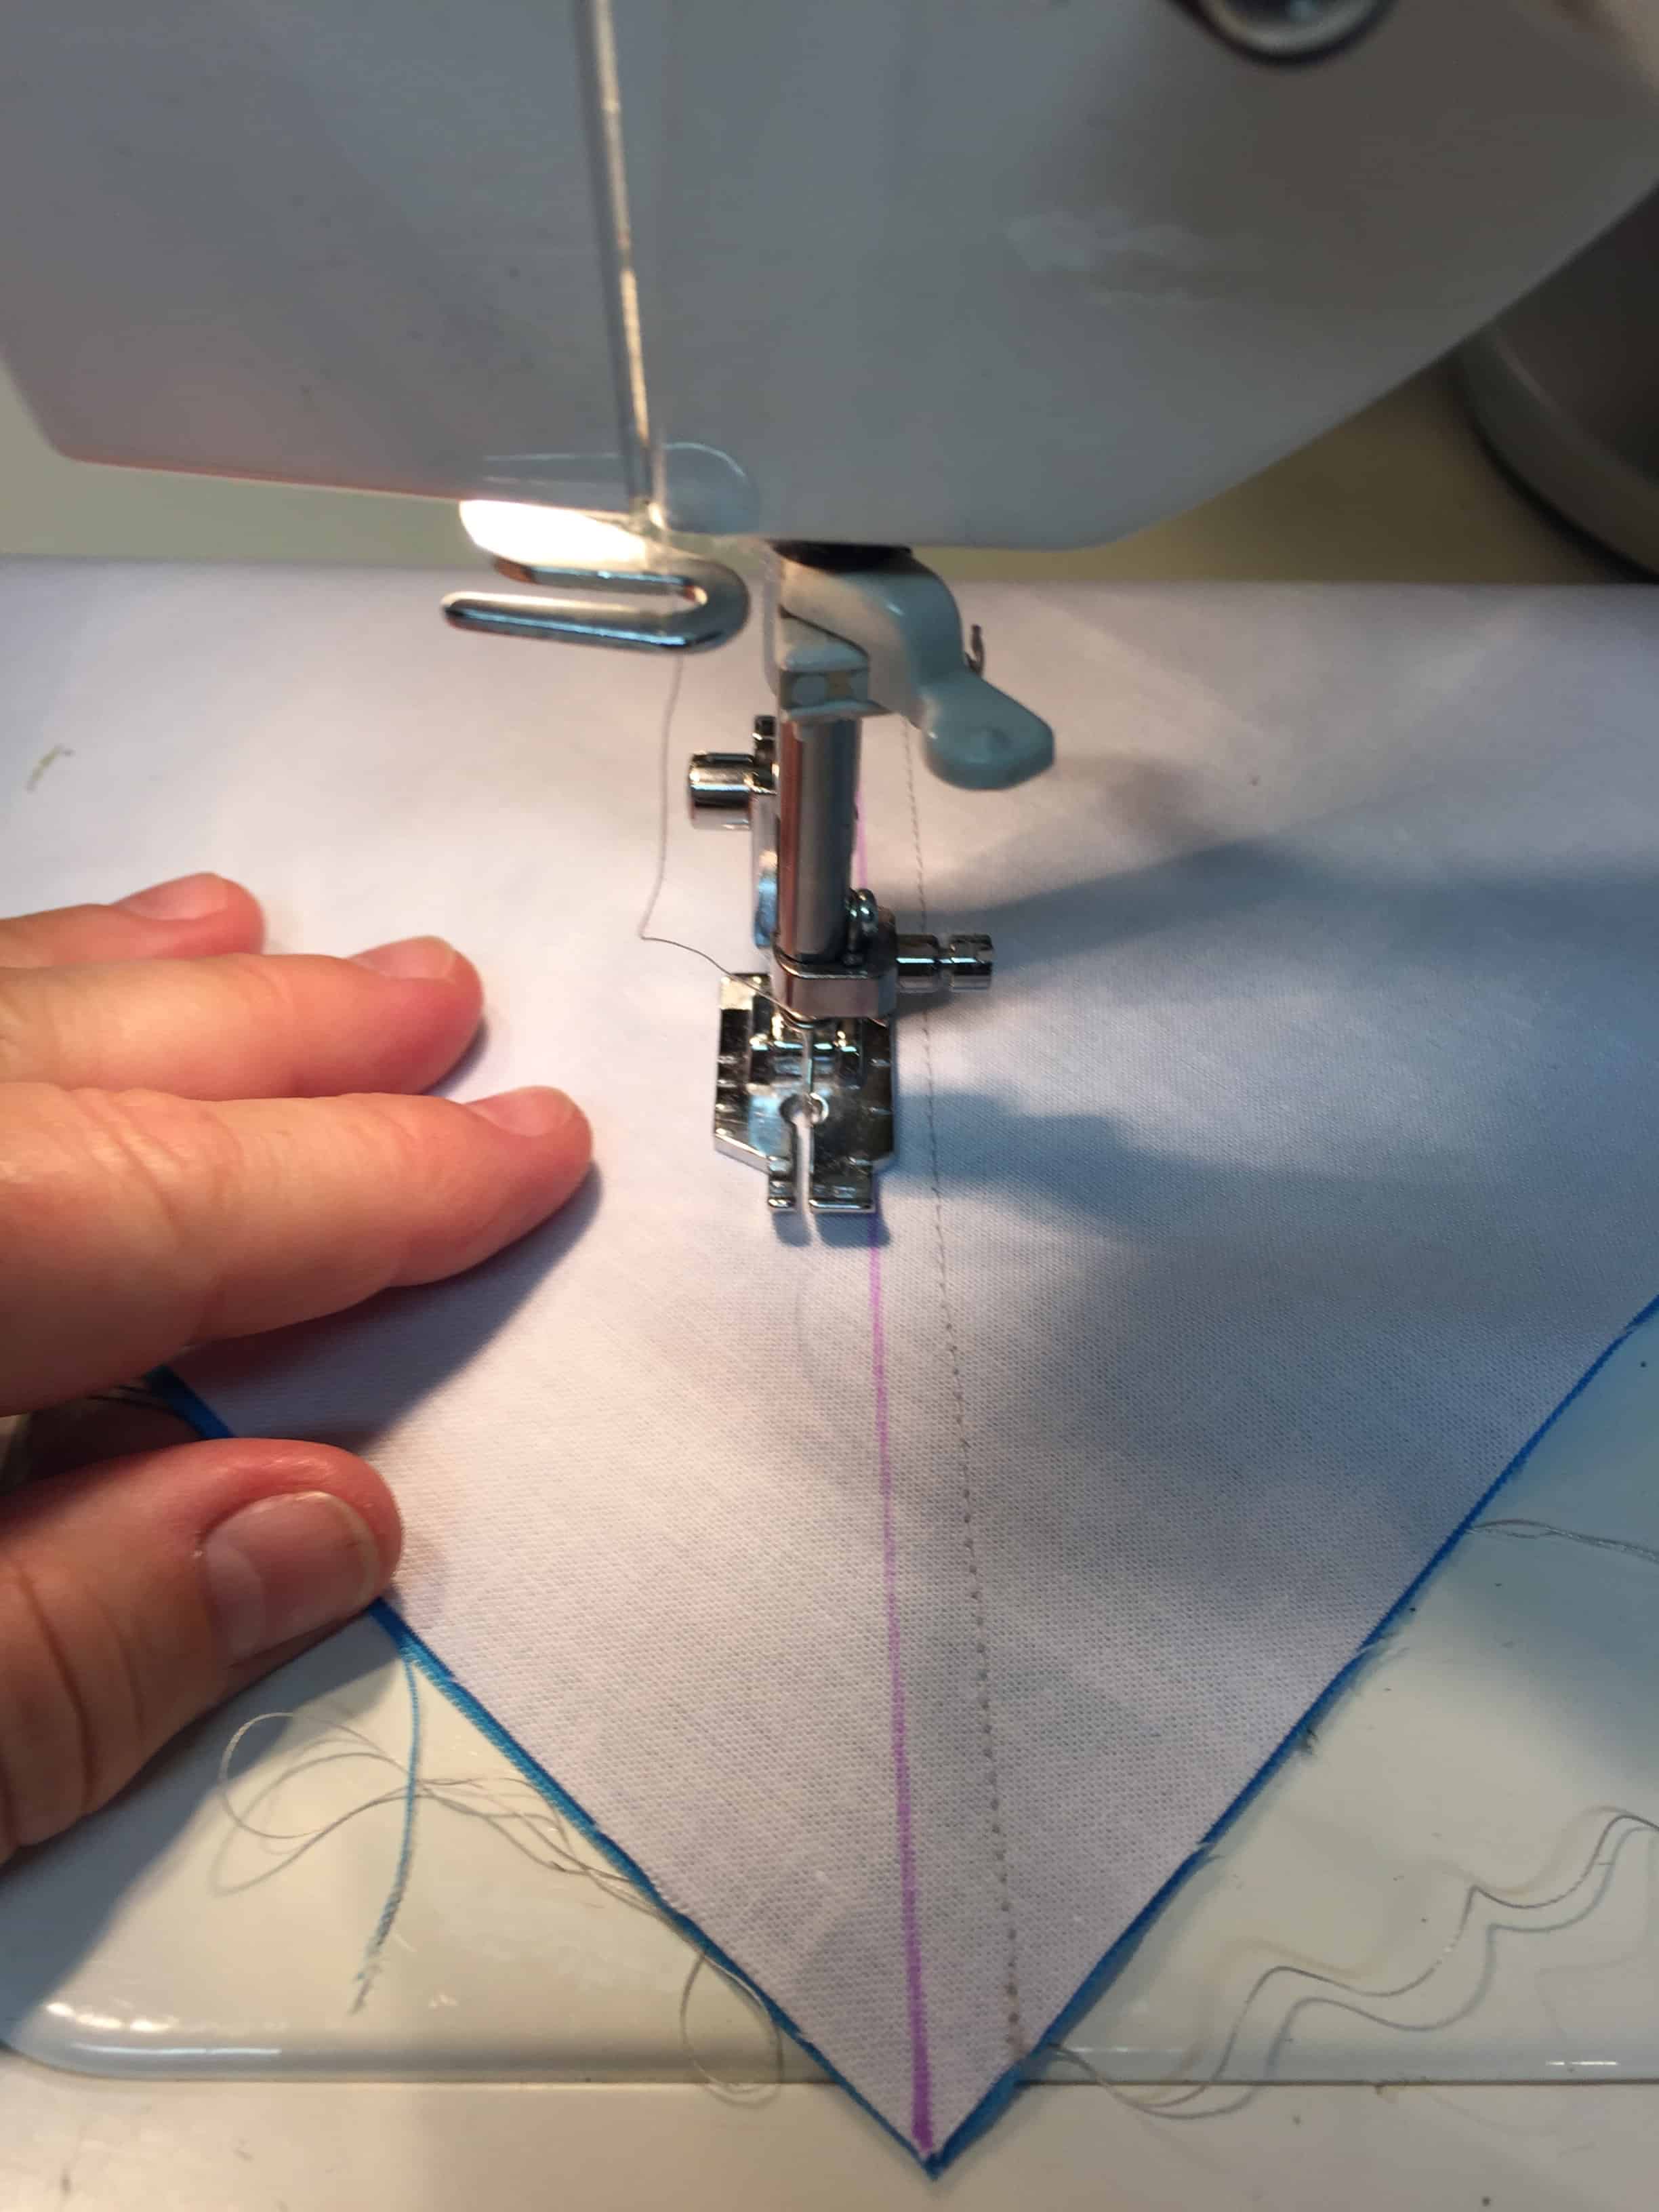
Take the two 10″ squares (light blue and dark blue). Mark a line from corner to corner. Sew 1/4″ on only ONE side of the line.


Cut along the marked line. Press open the seams on the sewn HST.
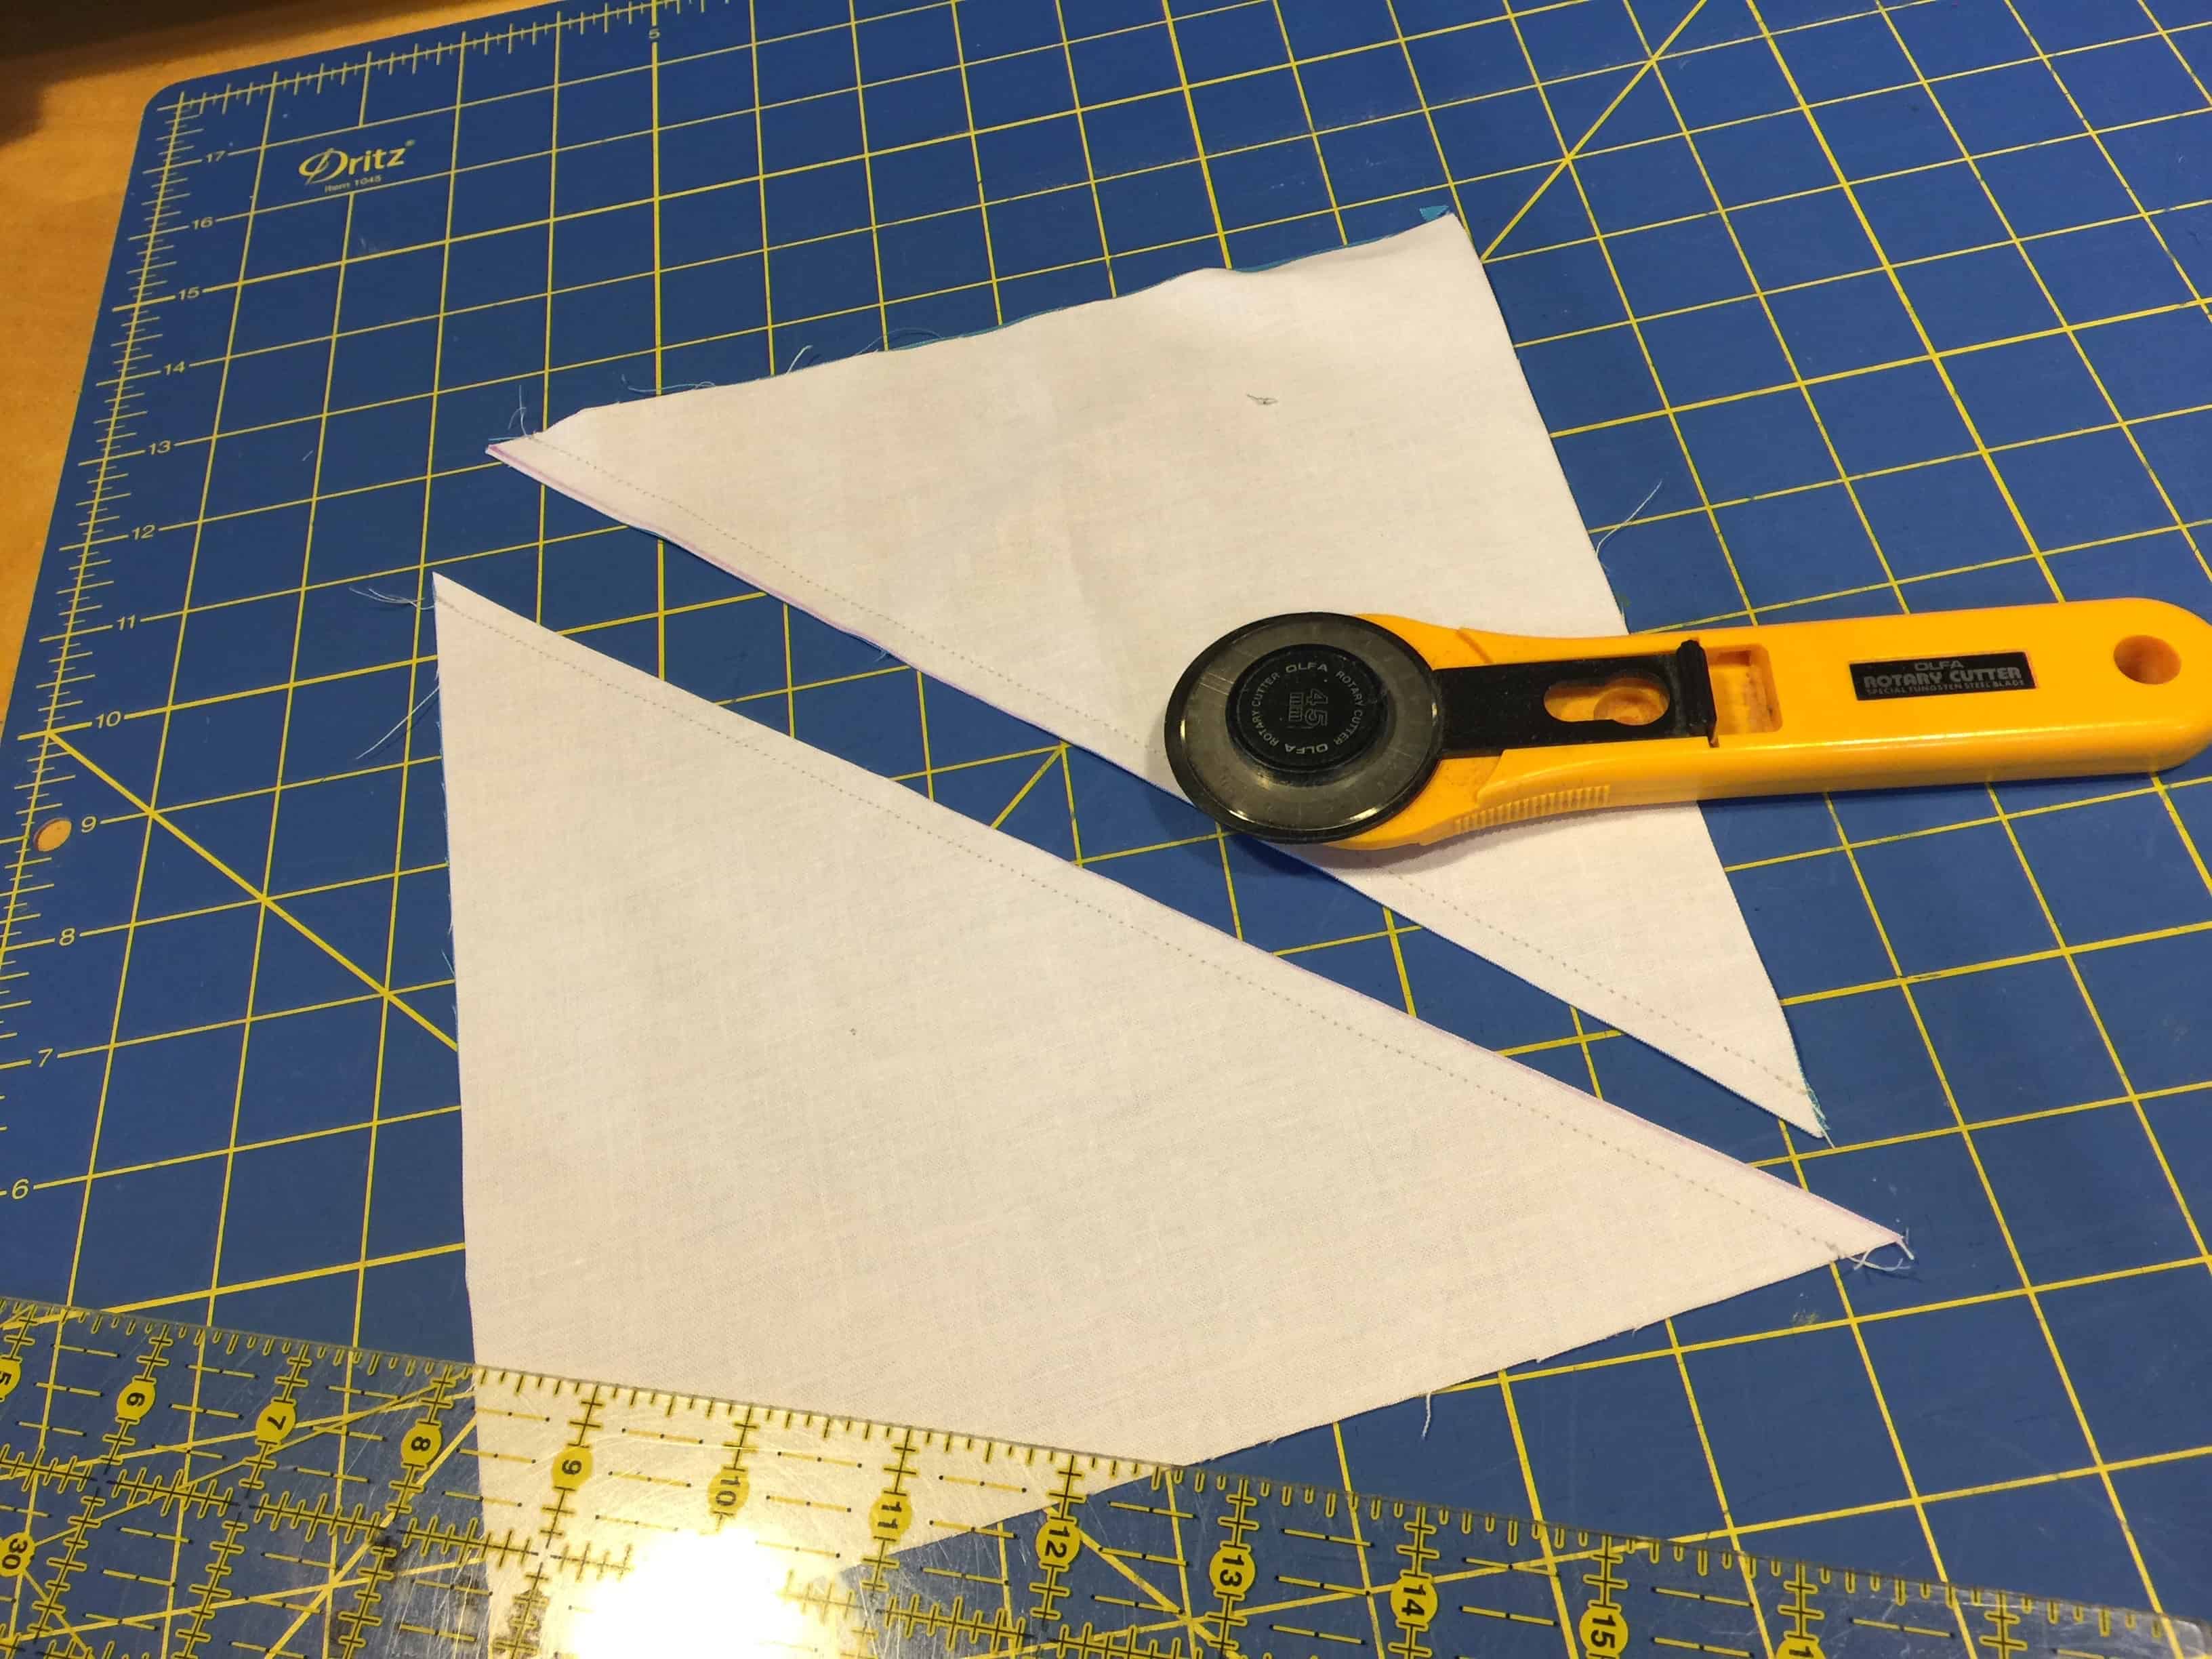
From the cut off fabric, use the remaining dark blue piece, lay over the HST, sew along the edge in the center to create a quarter square triangle that is the point of the arrow.
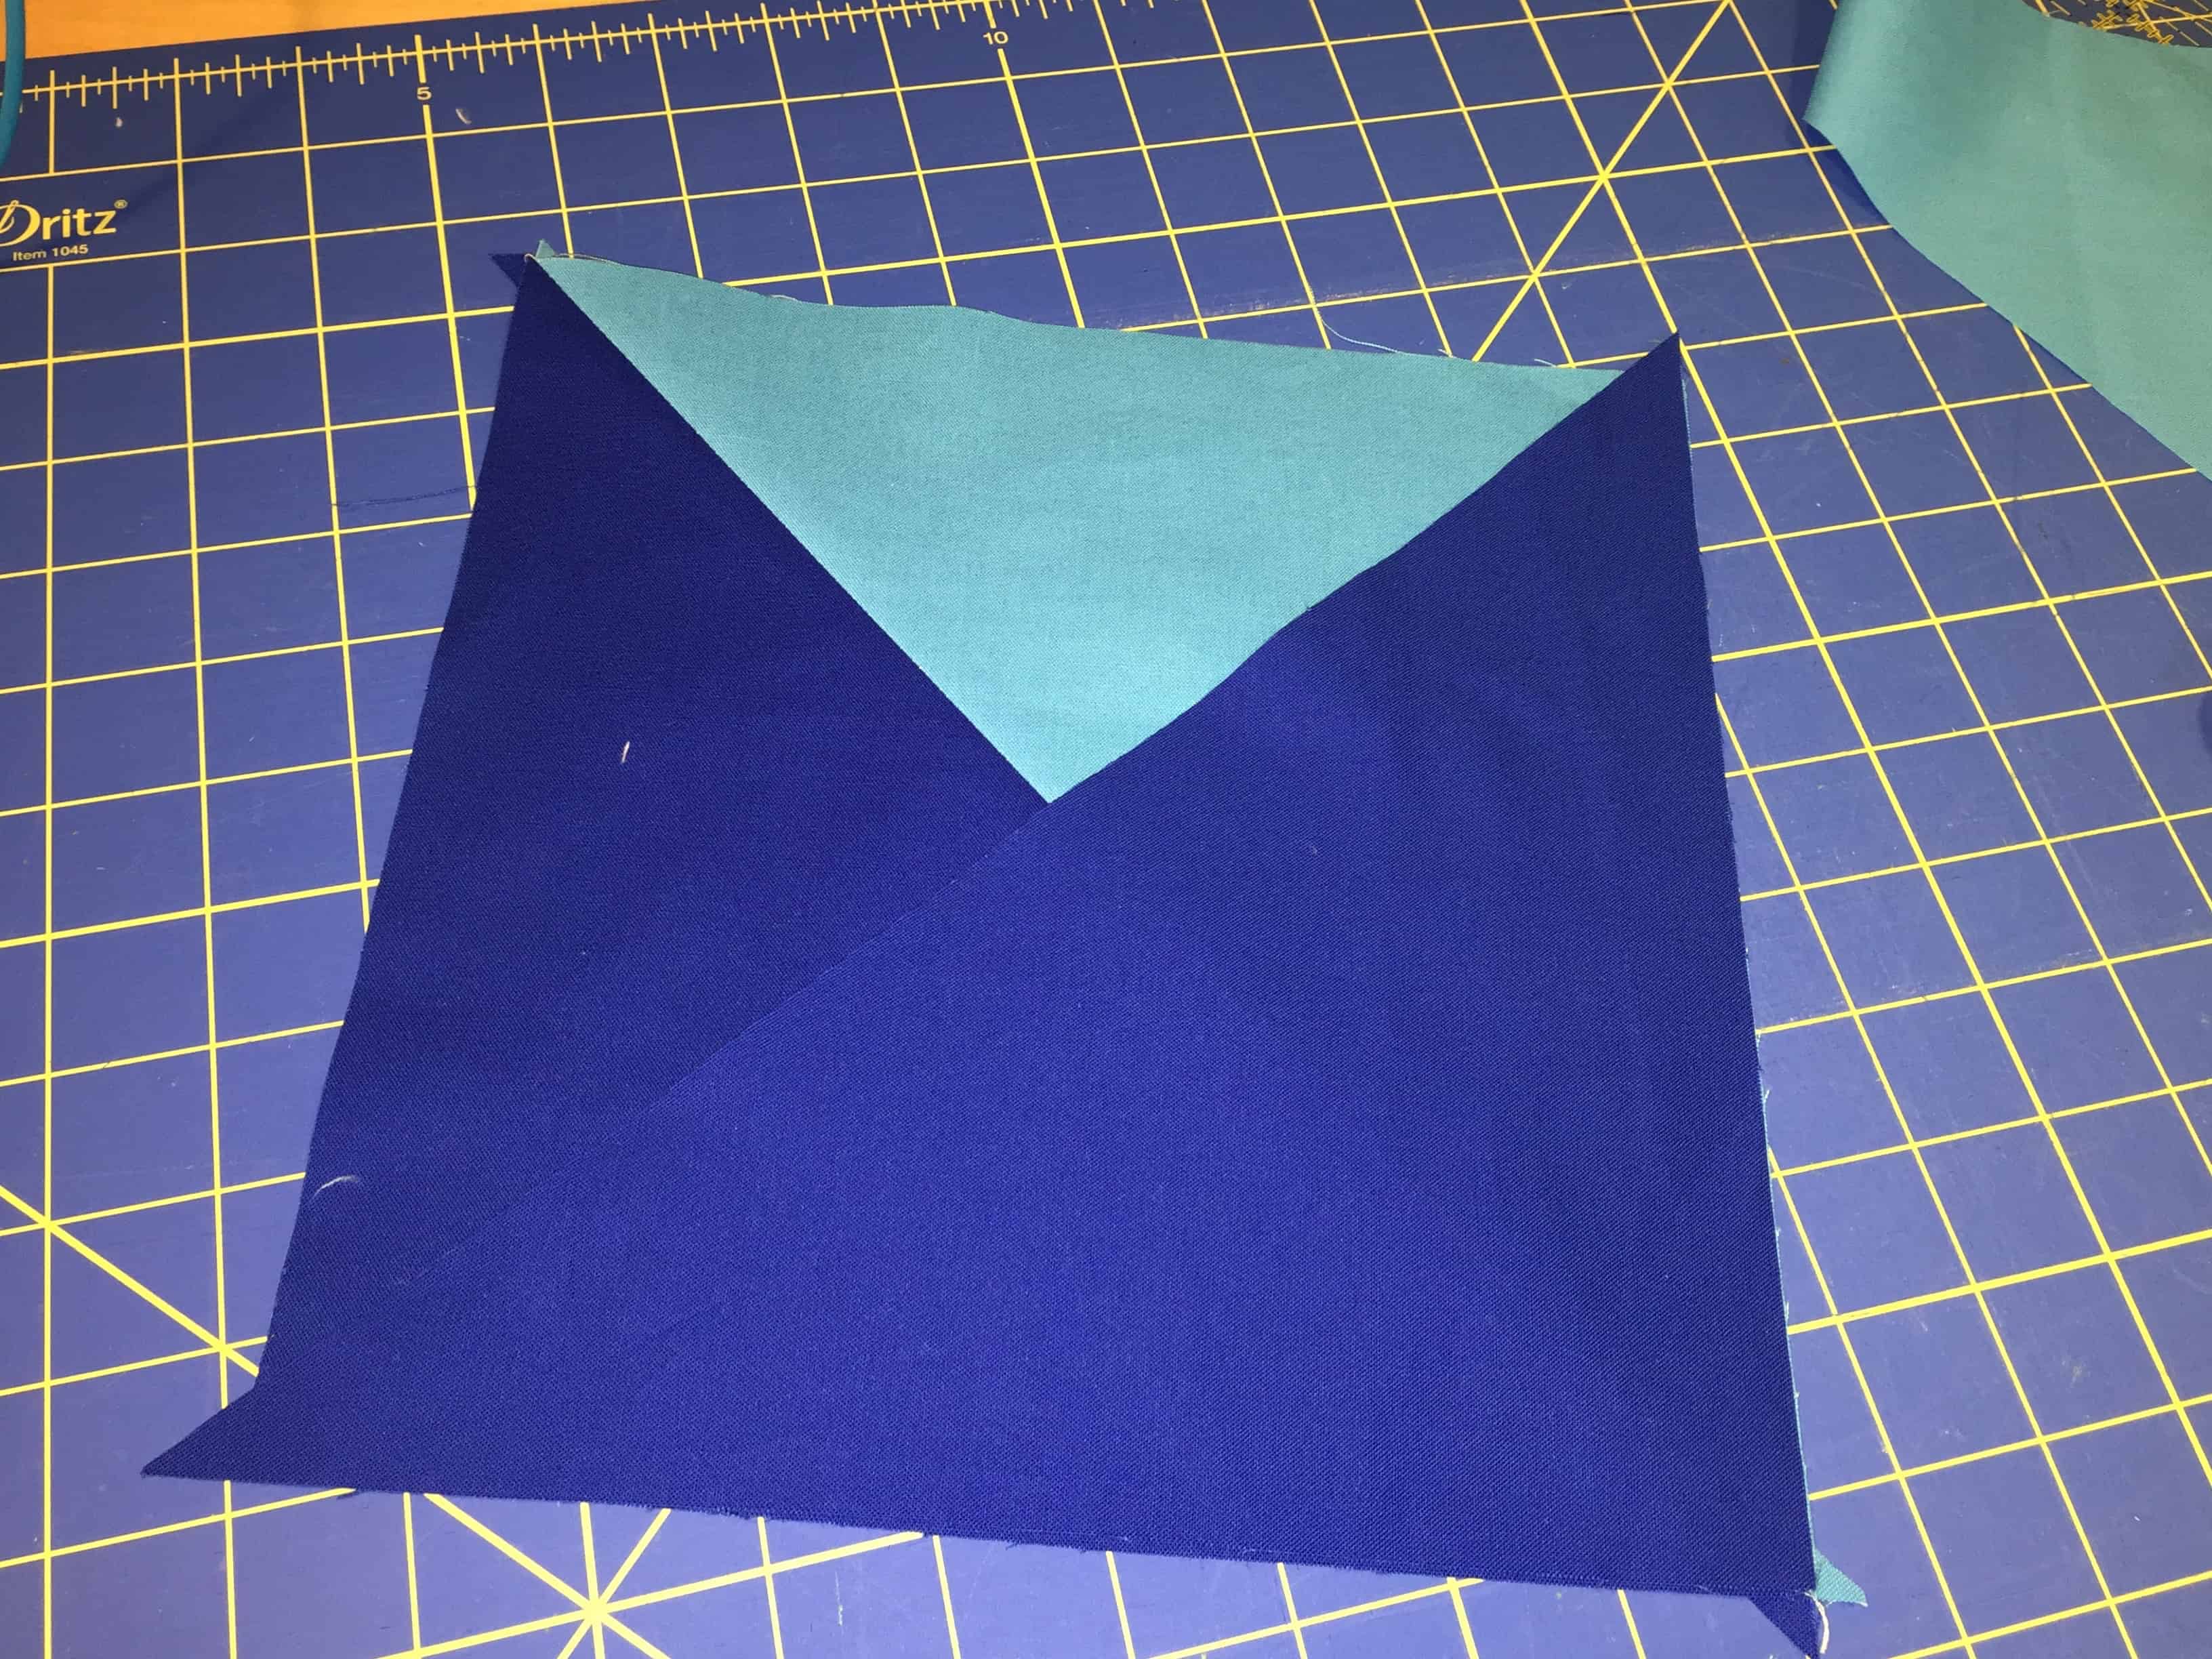
Cut off the back part of the QST and trim the block to 8″.
Join the 3 vertical blocks into 4 columns from top to bottom. I had to play with the placement a bit of the last column on the right to ensure that the point lined up correctly with the rest of the arrow. This part, honestly, I had to fiddle with quite a bit to make sure it lined up once I joined the two adjoining dark blue pieces.
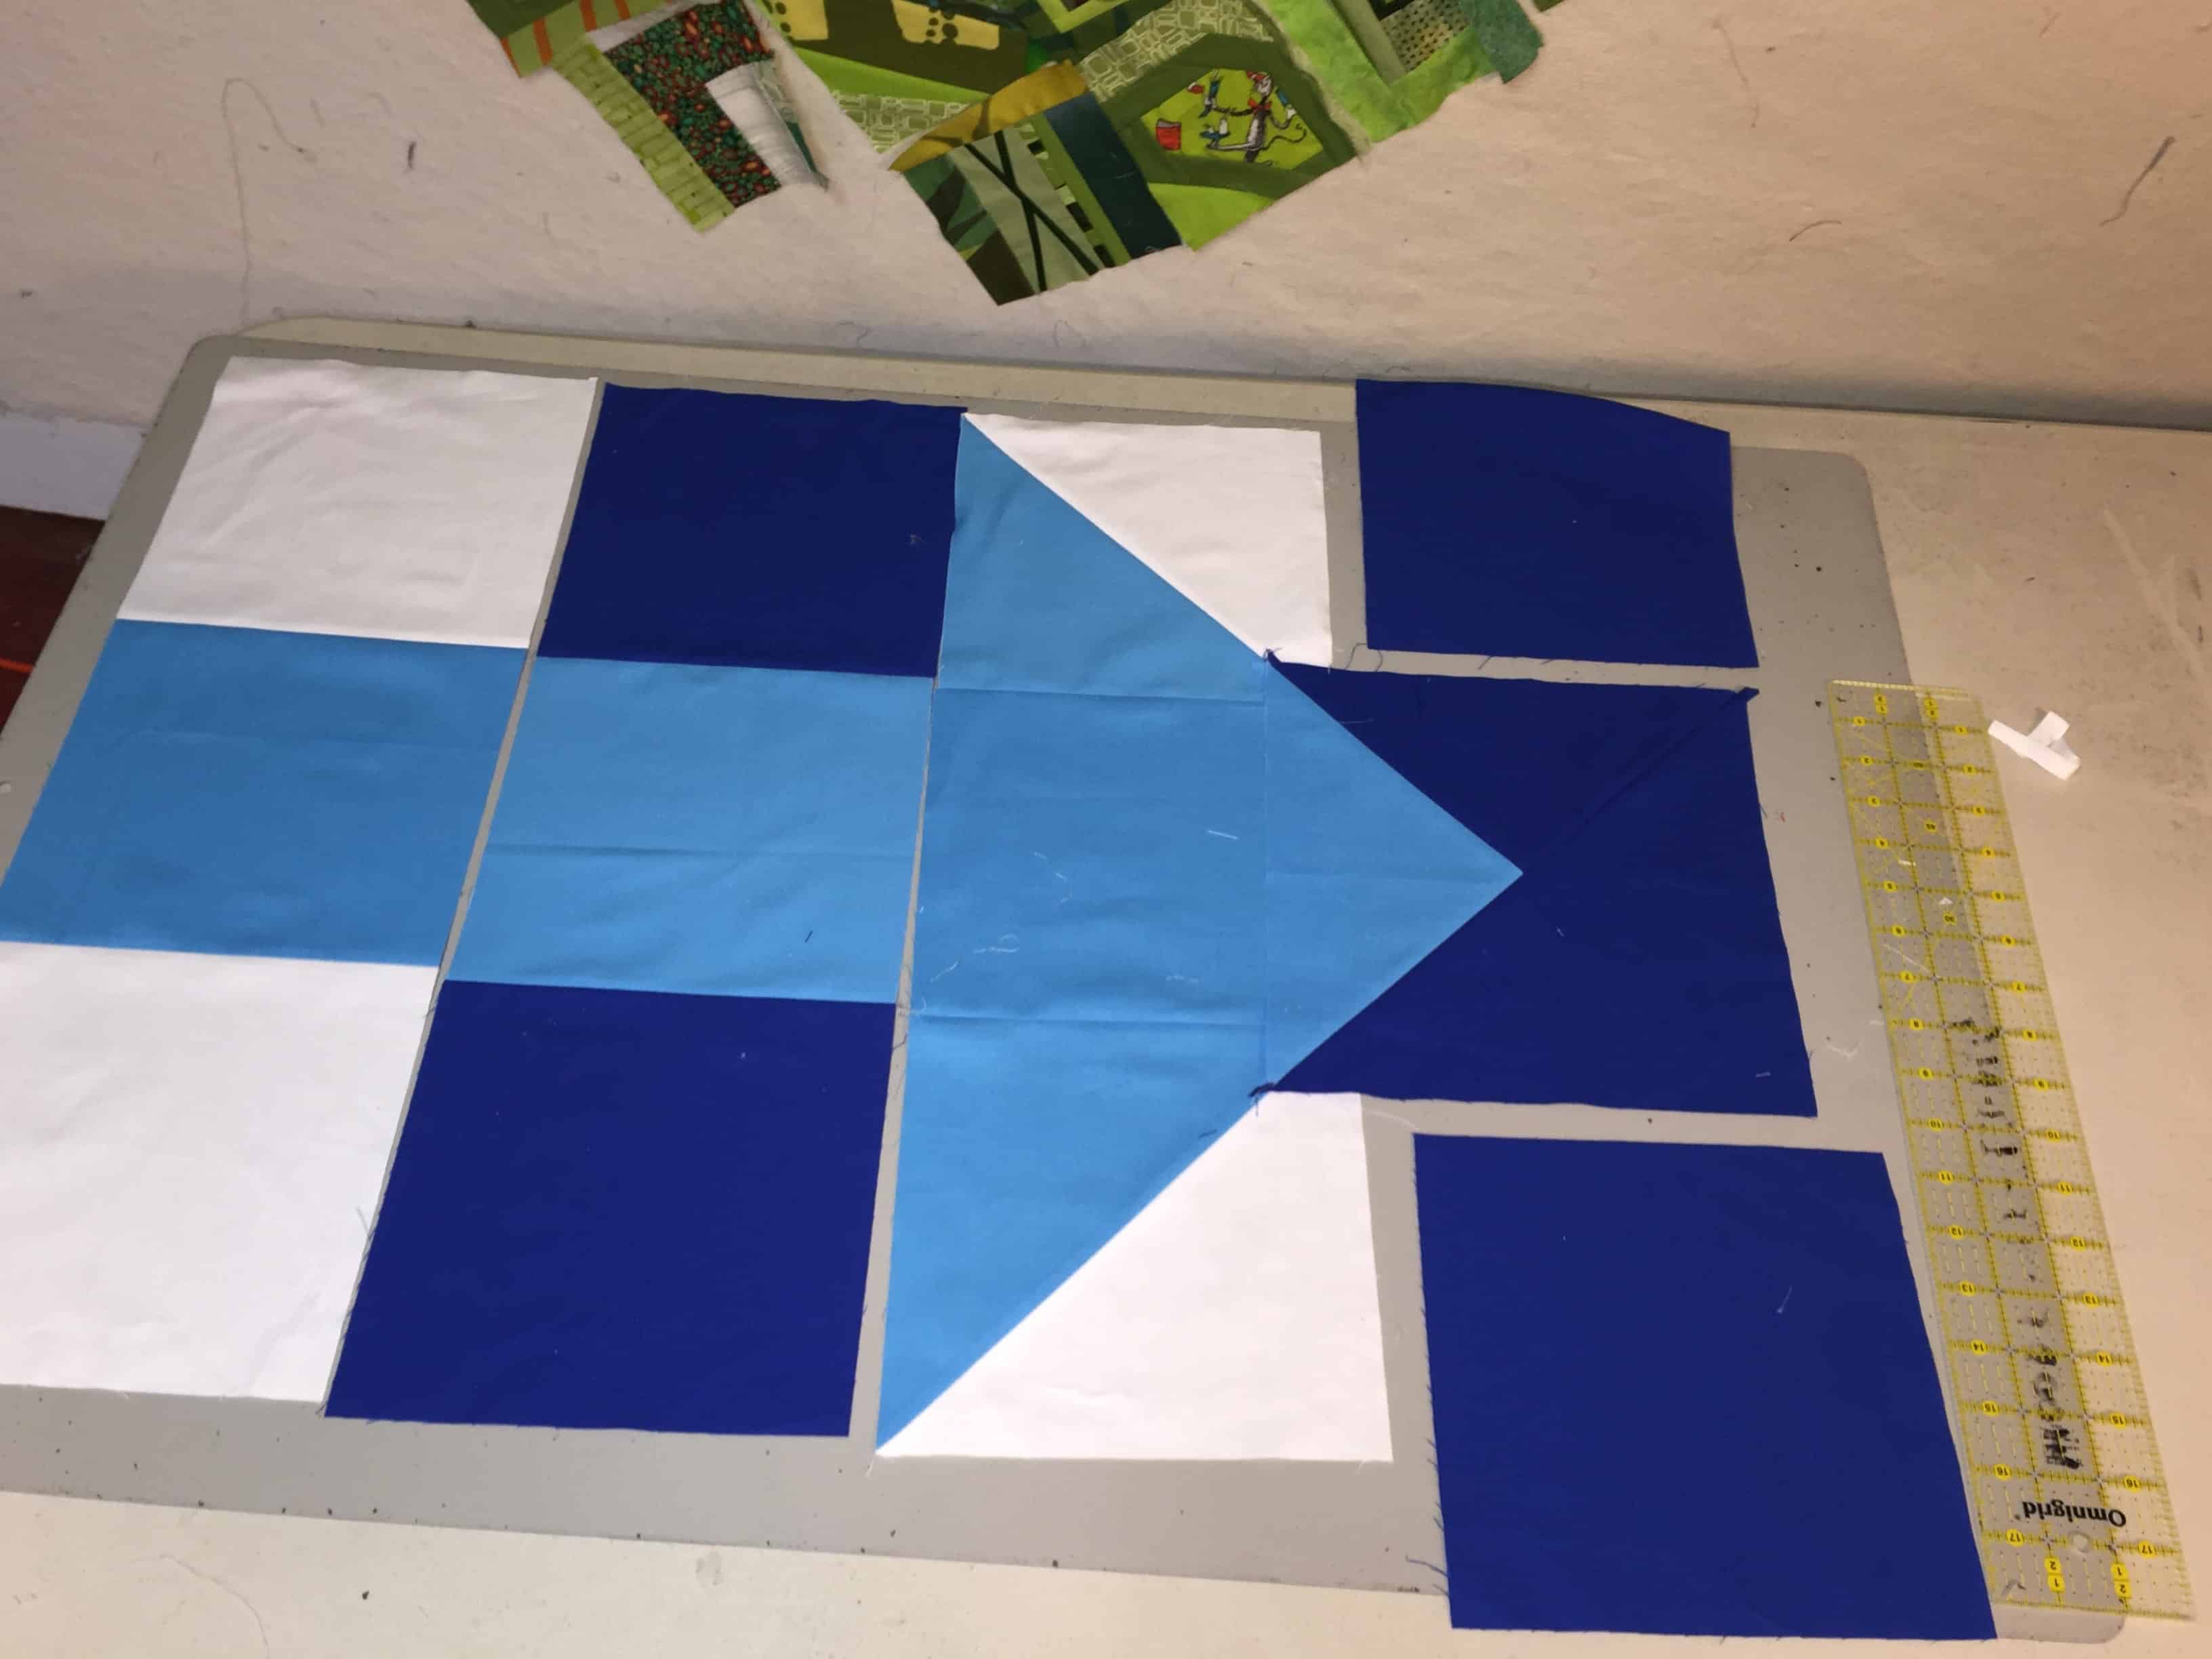
I added my remaining dark blue fabric around the edge of the logo to make it a (mostly) square banner. The logo is just over 26″ from the white bar on the left and the arrow point on the right. With added dark blue sashing all around it is 42″ square.

You can make this any size, larger or smaller, just decide at what you want your cut block size be, and add 1/2″ around all sides for the 1/4″ seams. Just use a bigger size square to make the HST and QST so that with 1/4″ seams you can cut it down to the size of the other blocks.
I haven’t decided what to do with this bigger one yet – whether to keep it this size or make it a full sized quilt. My daughter, a beautiful, smart young young teen, and avid Hillary fan, is home Tuesday following 6 weeks volunteering in Panama with Amigos de las Americas. She missed this week’s historic DNC activity. So much of what transpired made us think of her. I have a feeling she might like this quilt for herself!
Below are photos of the first one now our window. I’ll post an update once I finish quilting the bigger bigger one – whatever that may become!
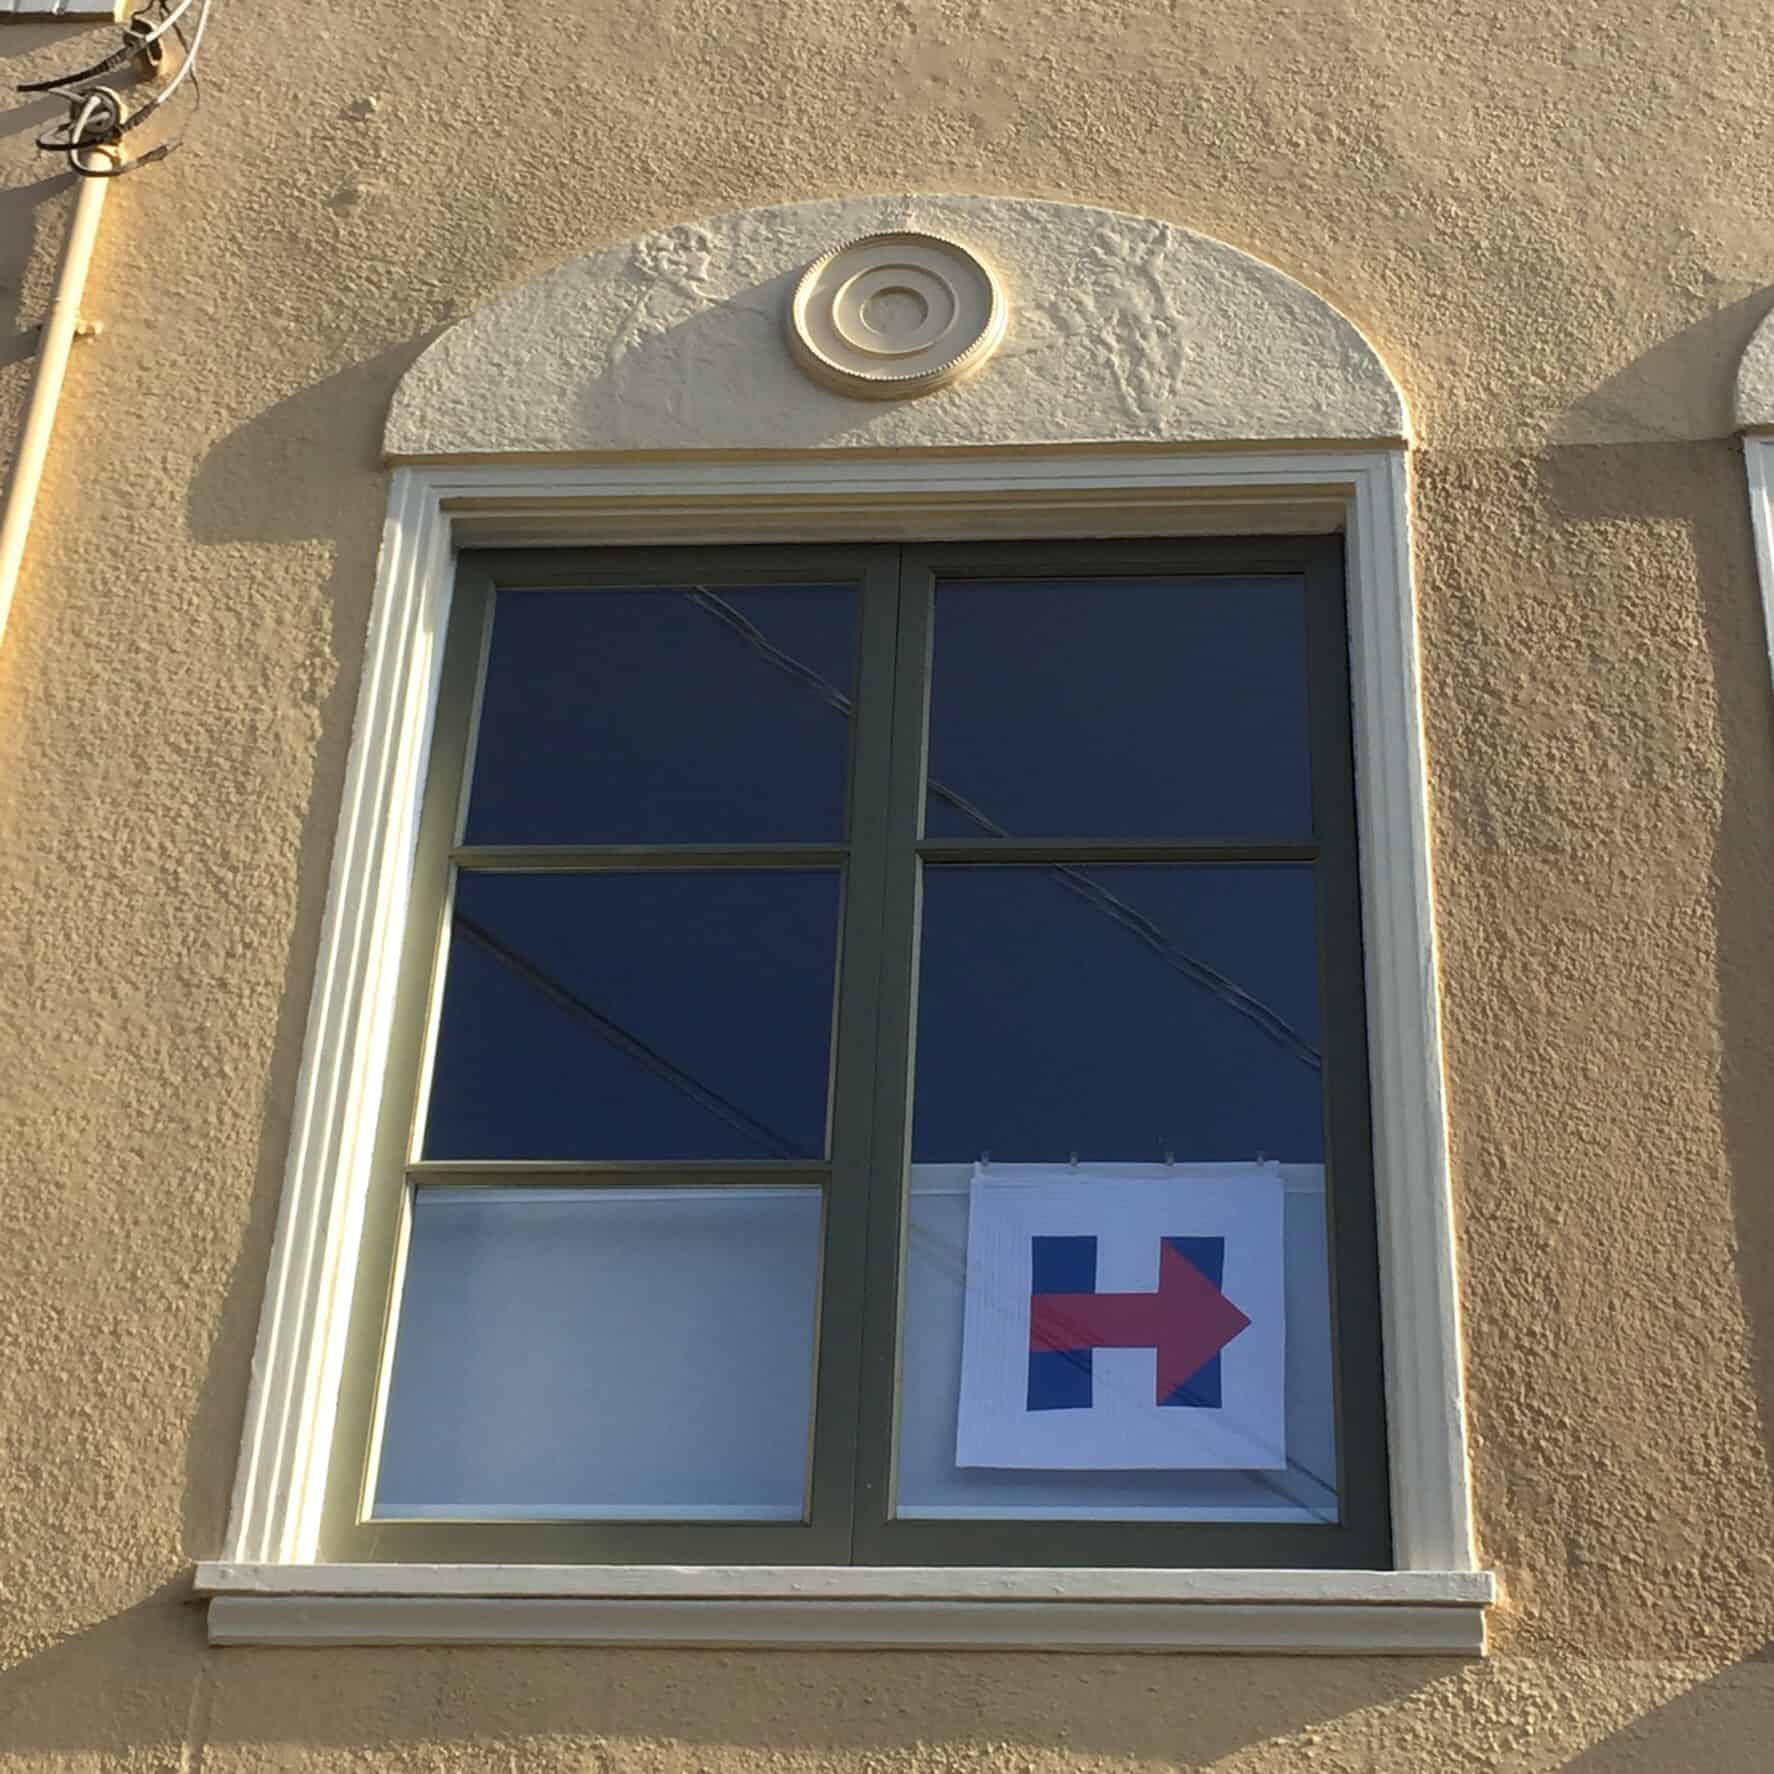
DIY Window sign
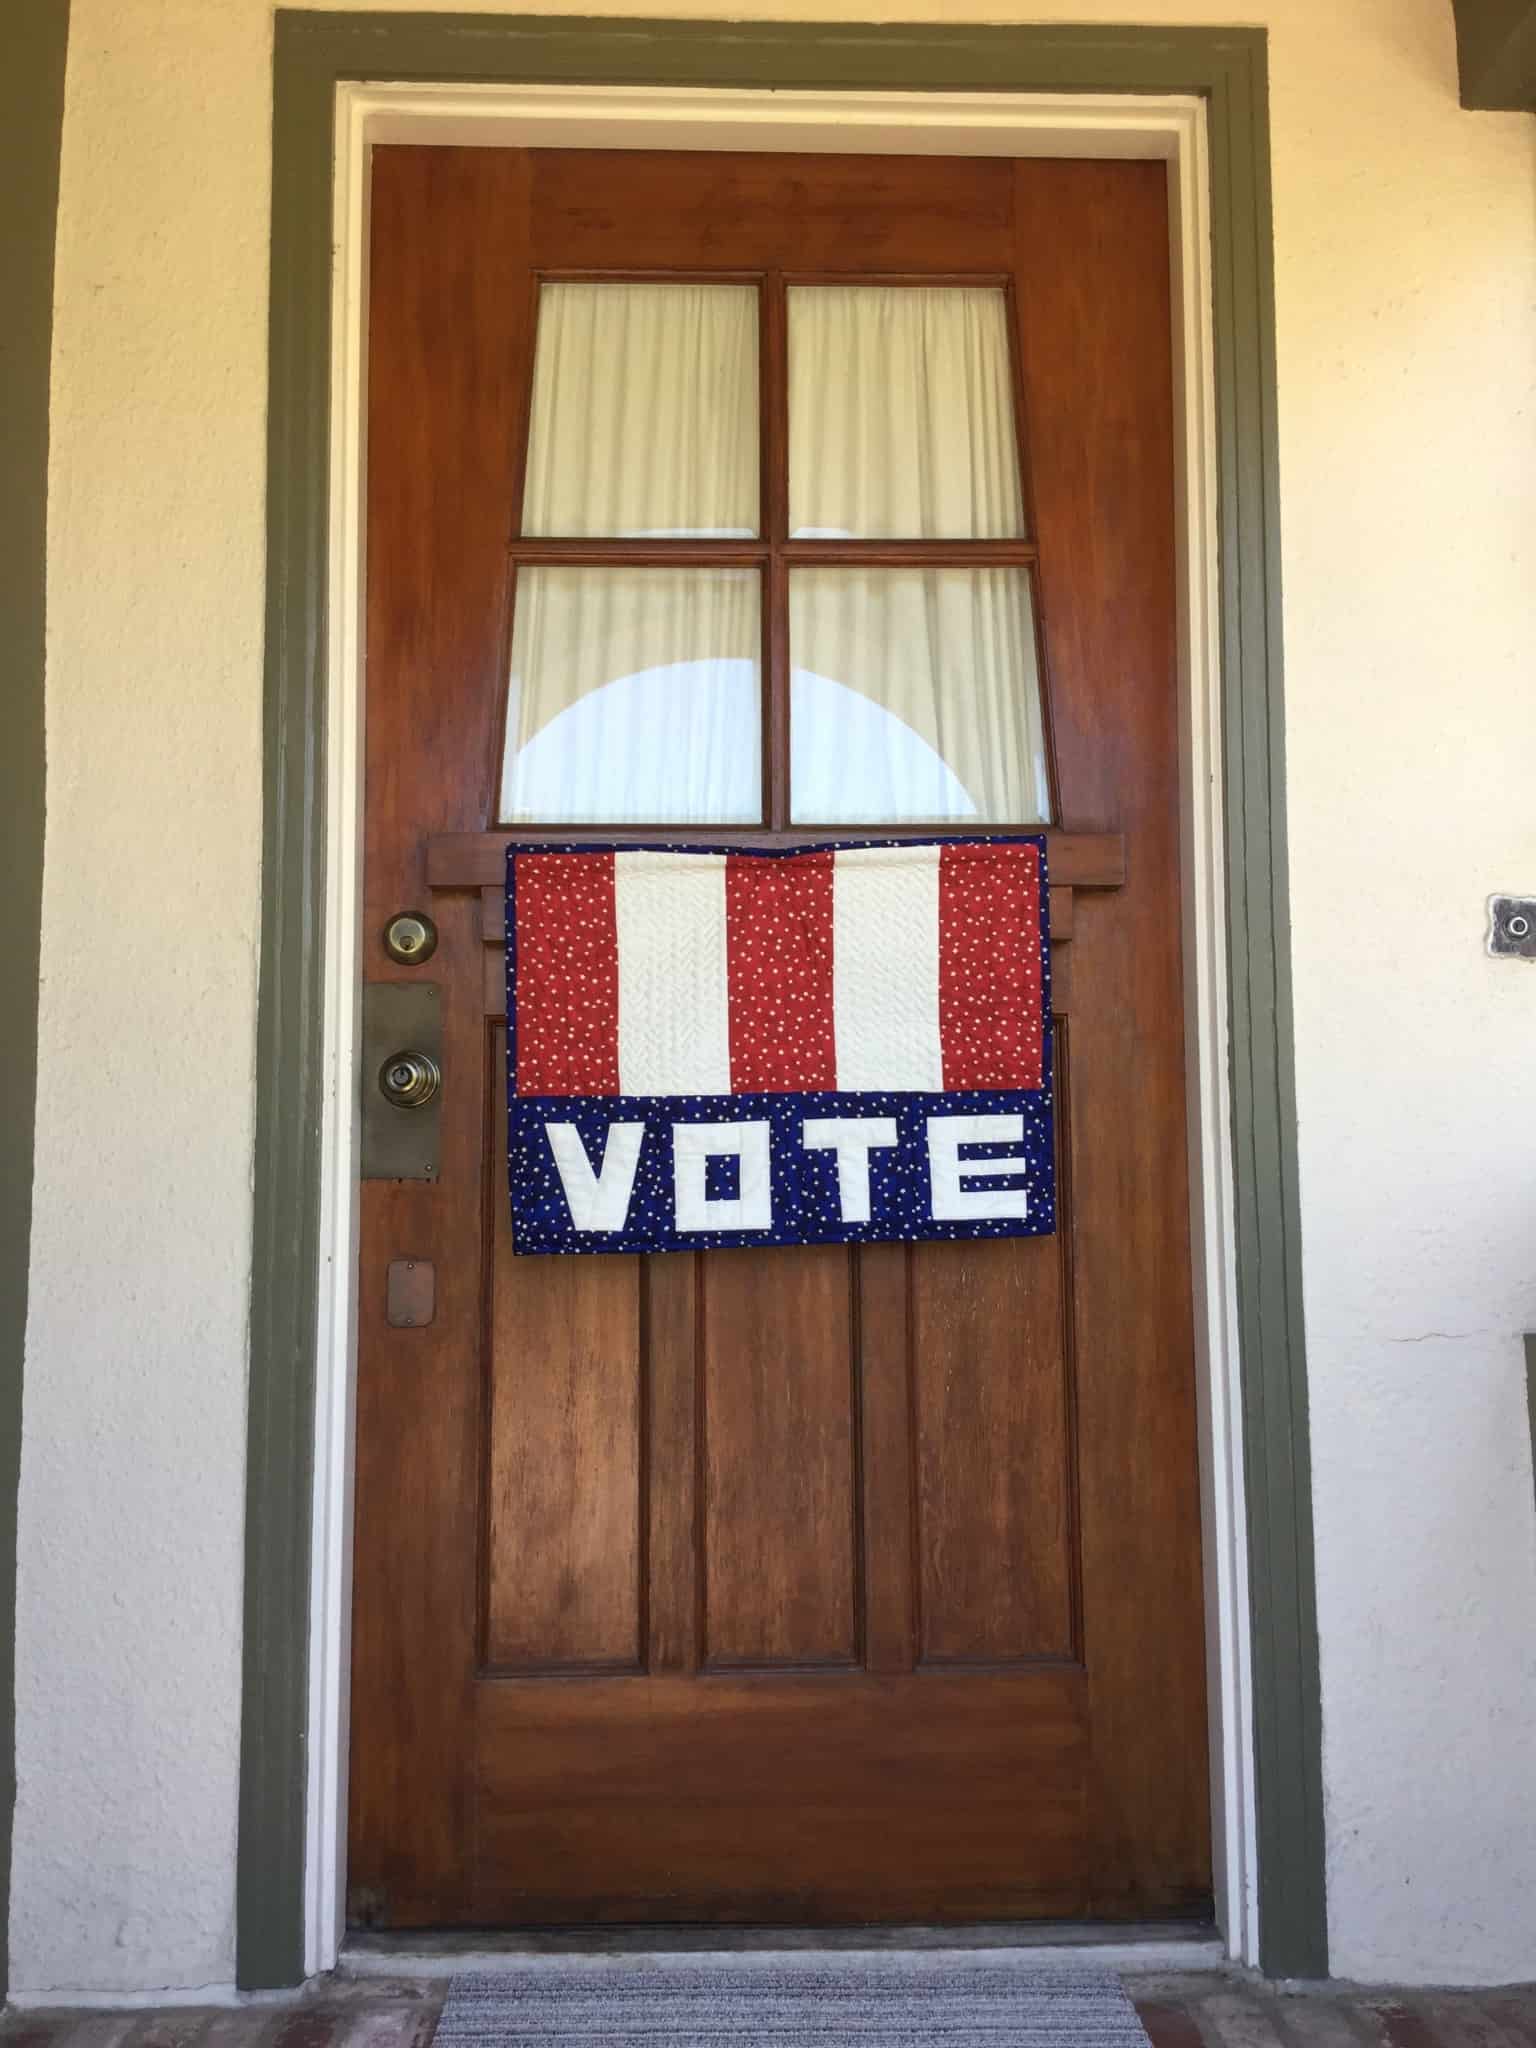
No matter what – exercise your right to vote!!!!!